Ready to level up your virtual tours? Adding floorplans offers a great way to do just that! Floorplans give your viewers a clear and comprehensive overview of the space you're showcasing - whether it's a house, an apartment, or an office - and help them make more informed decisions.

Check out this 45 seconds guide to set up floorplans in your 360 tour!

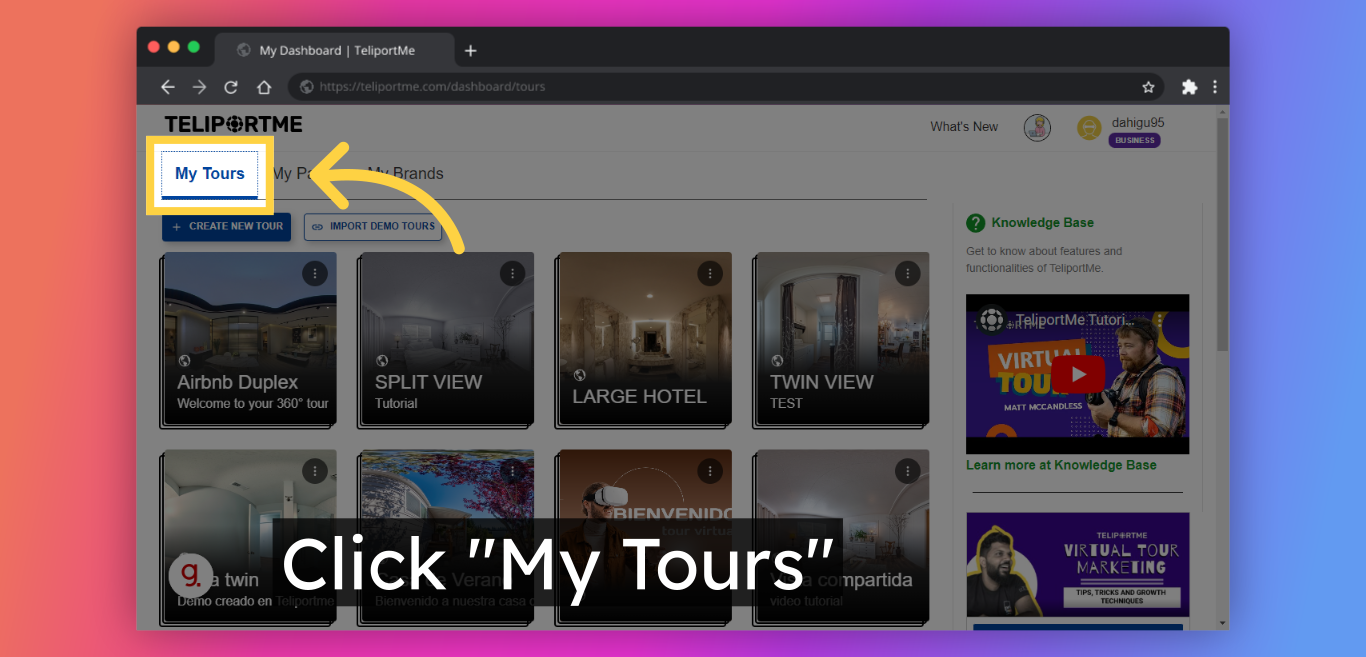
Go to your dashboard after you have logged into teliportme.com
1. Click "My Tours".
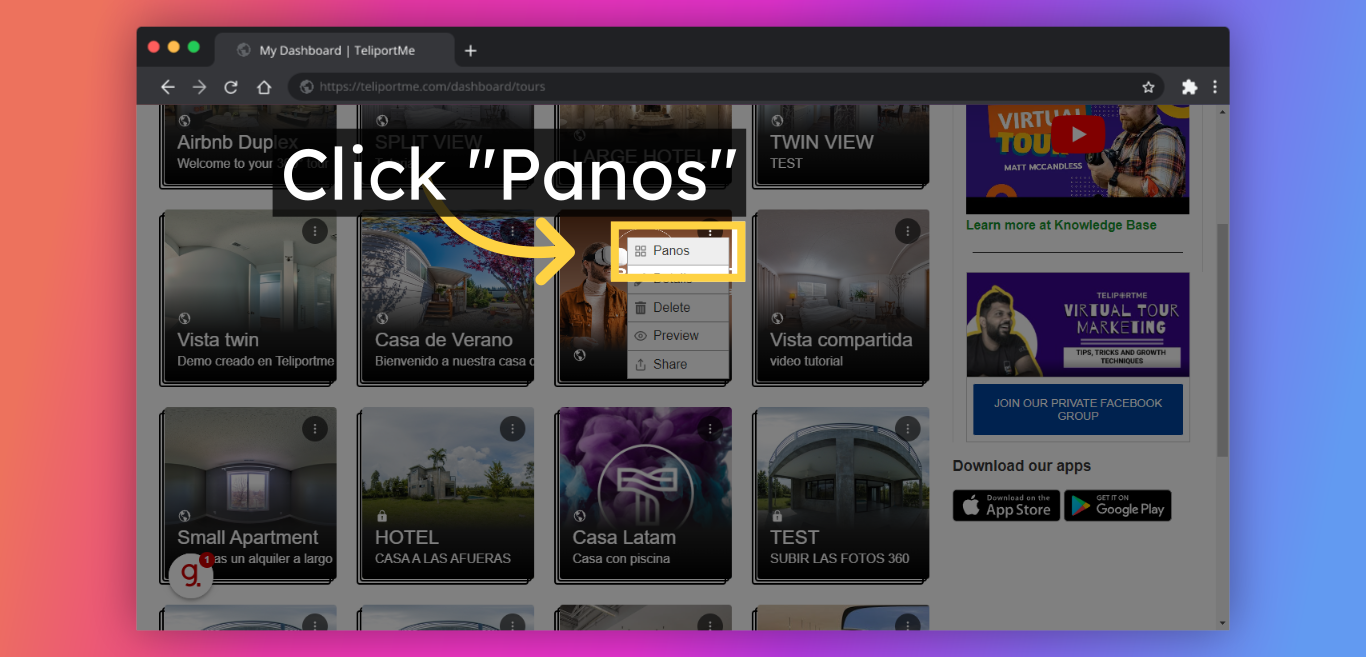
2. Click "Panos" or on the tour, you want to add floorplan.
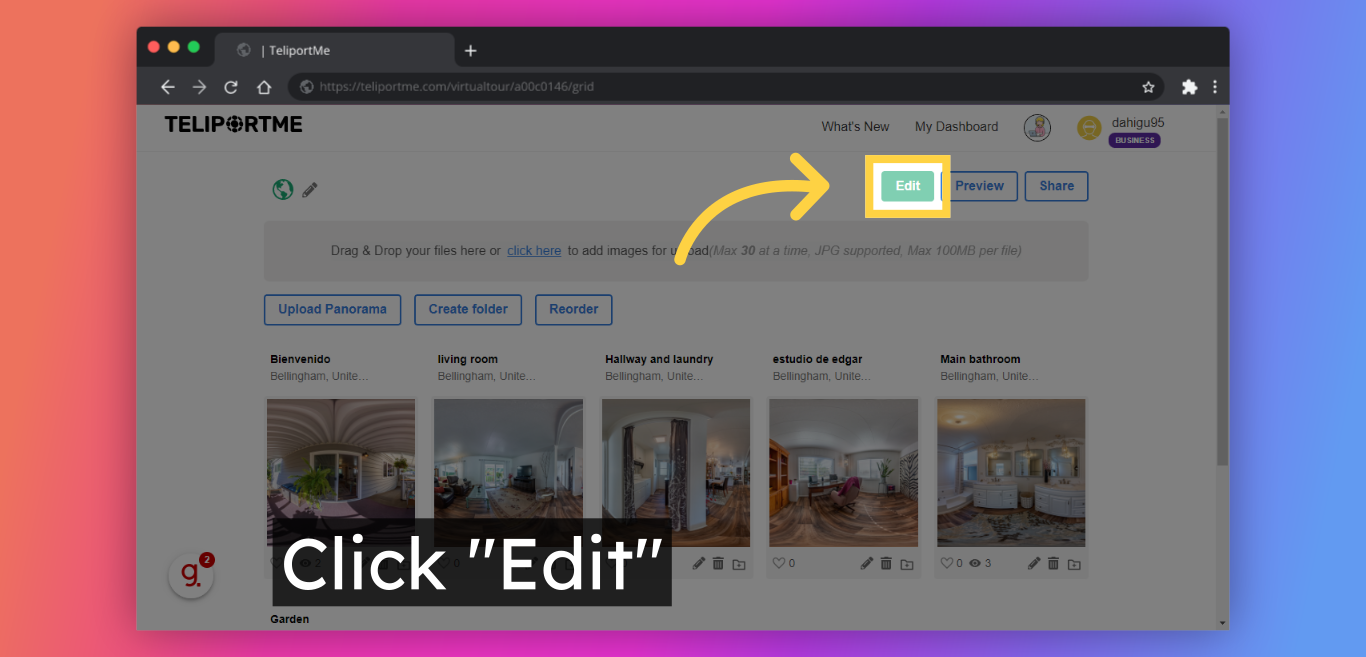
3. Click "Edit".
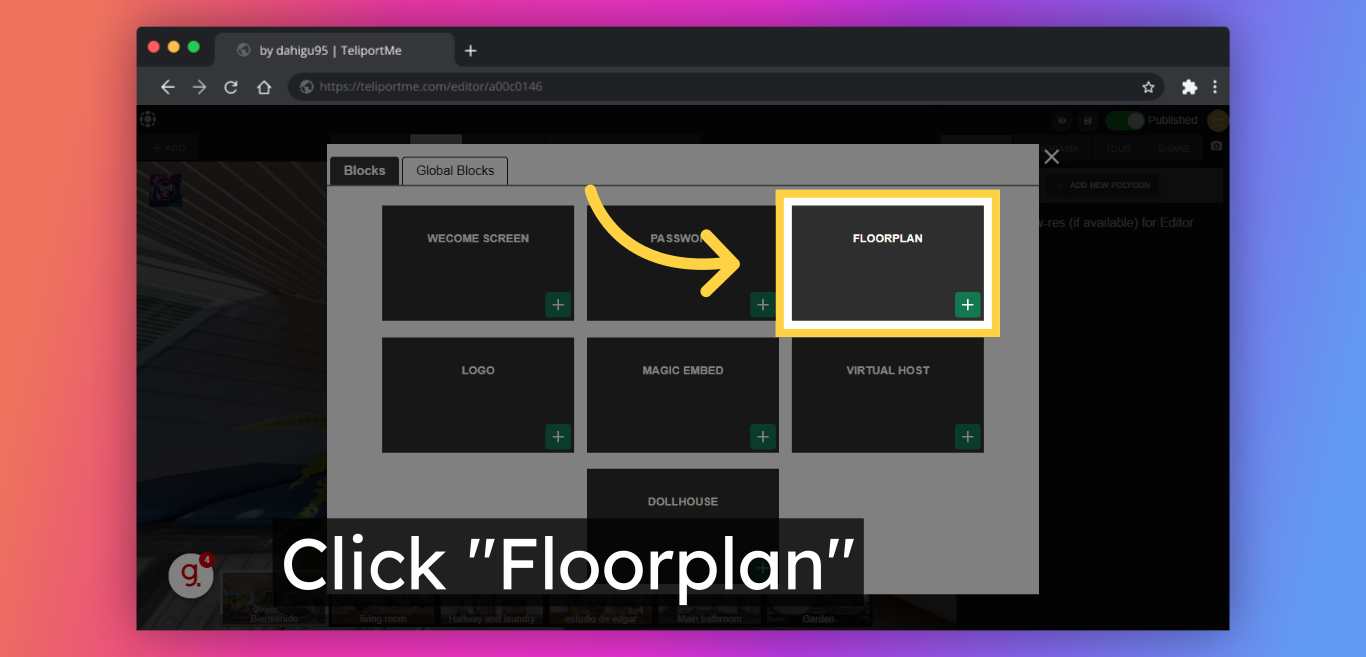
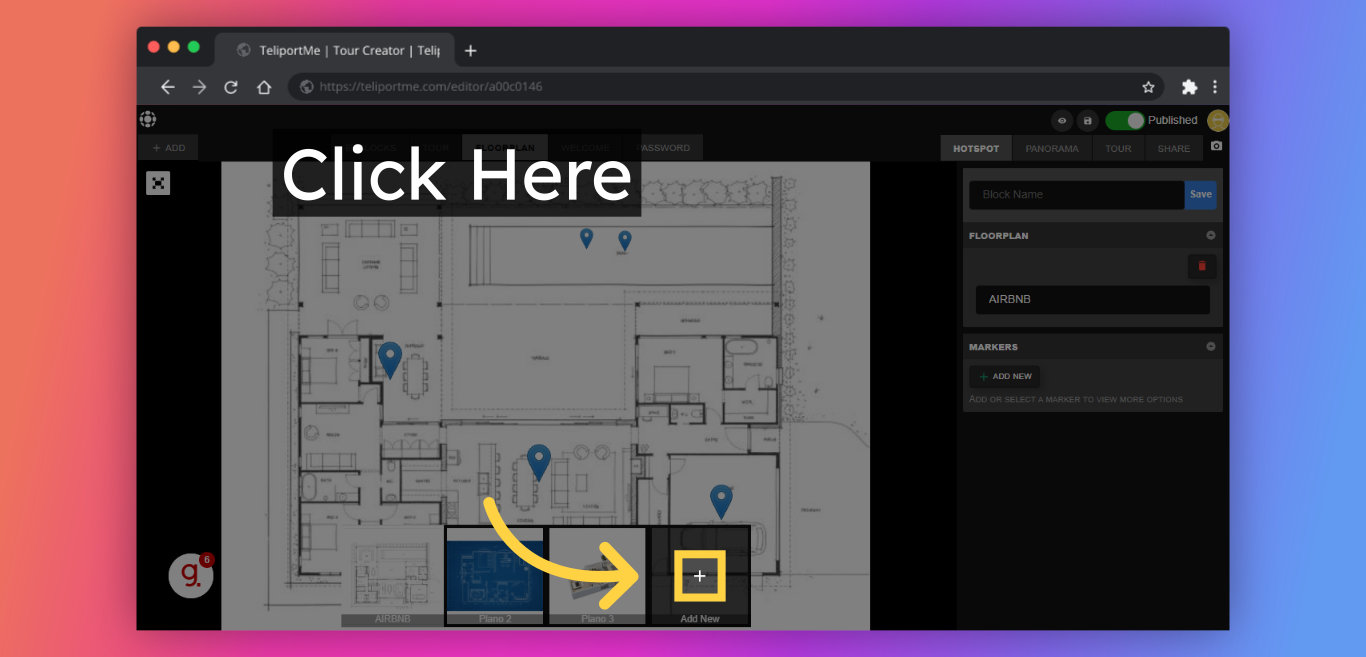
4. Click "Add" in this top right-hand box to view the blocks.

5. Select "Floorplan" and add it by clicking on the "+" symbol.
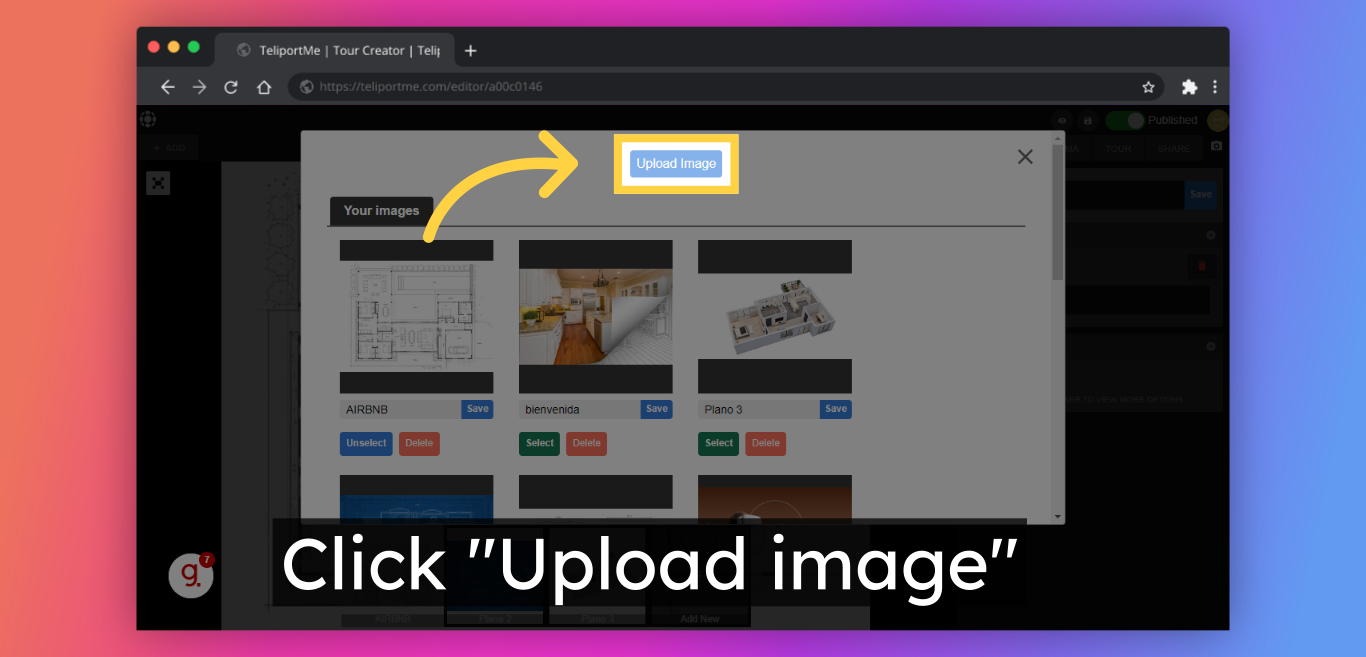
6. Click in the box to "Upload your floorplan".
7. Select the image you want as your floor plan and click on "Upload image".

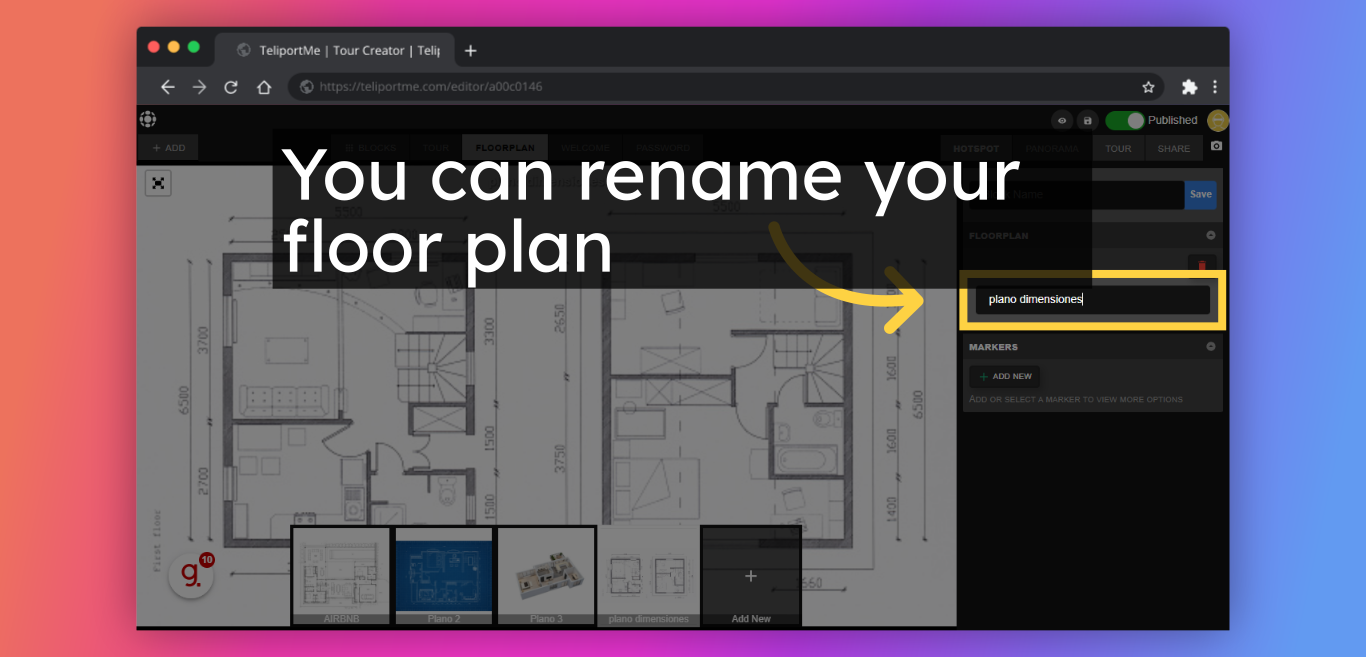
8. Fill in the "Name box" and make your floor plan unique by personalizing it with a new name and customizing the font.
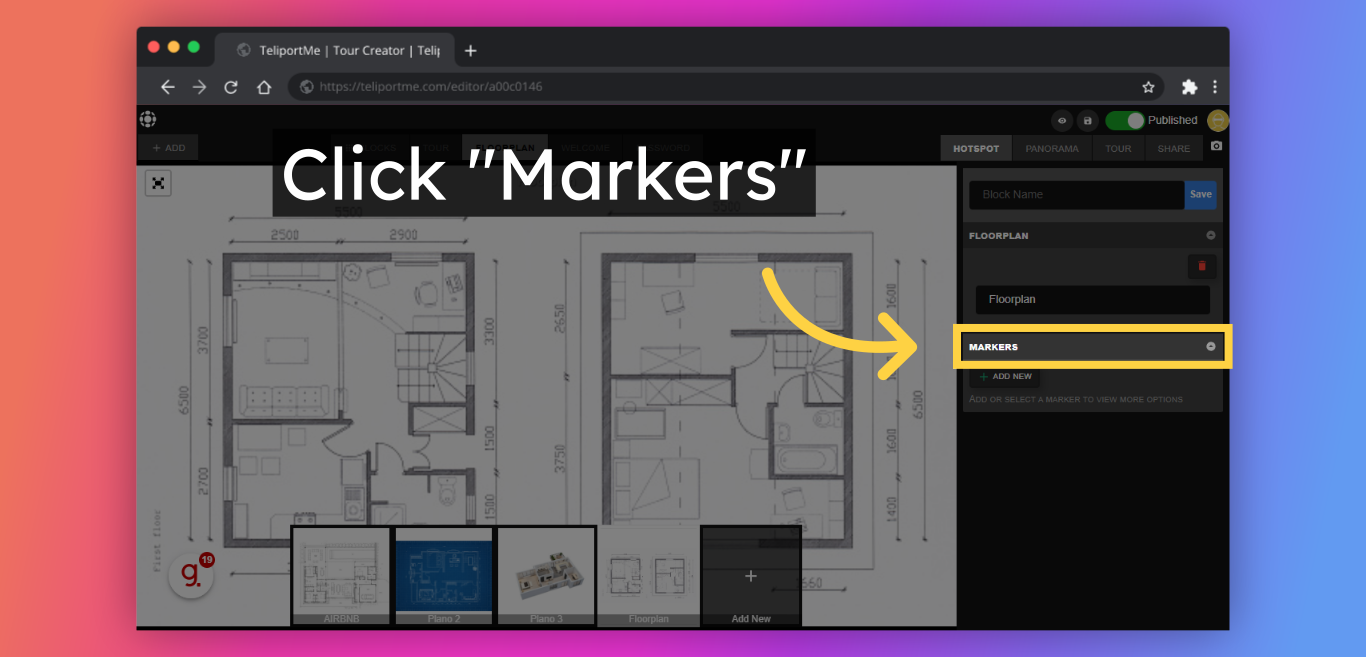
9. Add specific "Markers" for each room.
10. A "Marker" in the form of a pin/droplet will appear on the floor plan.

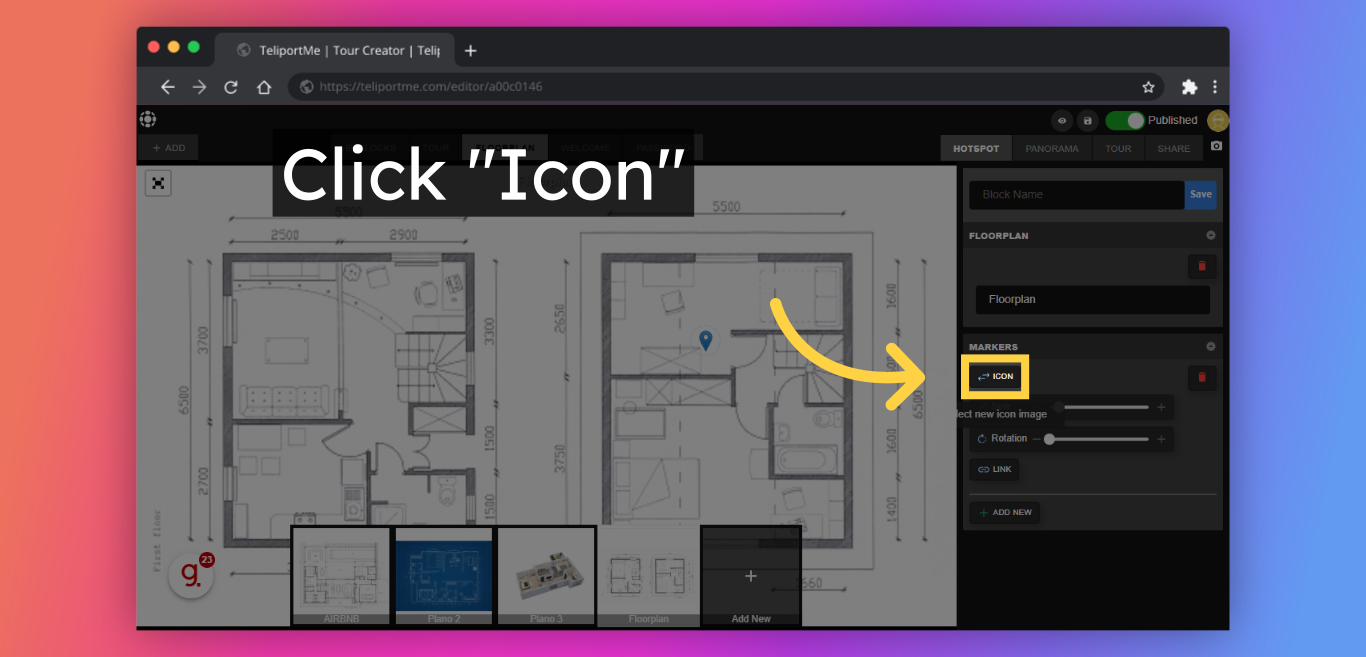
11. Click "Icon" and select your preferred design.
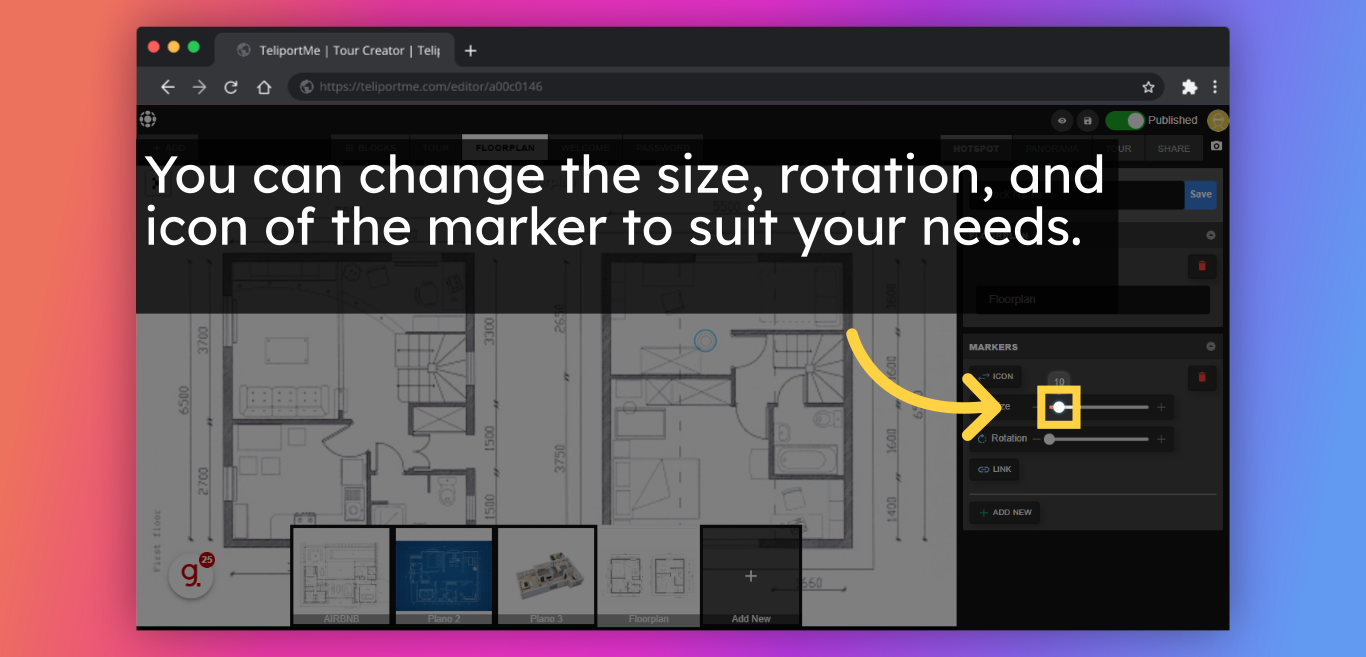
12. You can change the size, rotation, and icon of the marker to suit your needs.
13. Click "Link" to connect the marker to the panoramic photo.
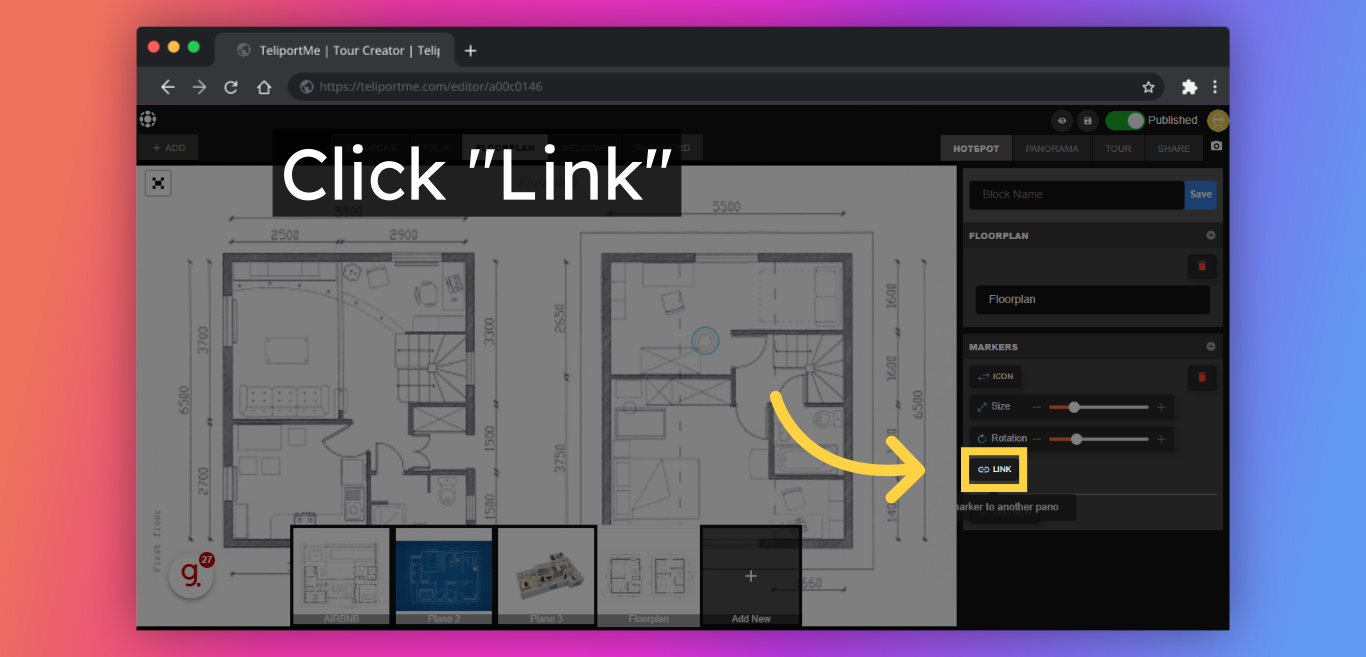
14. Select the panorama that you'd like to link with the marker.

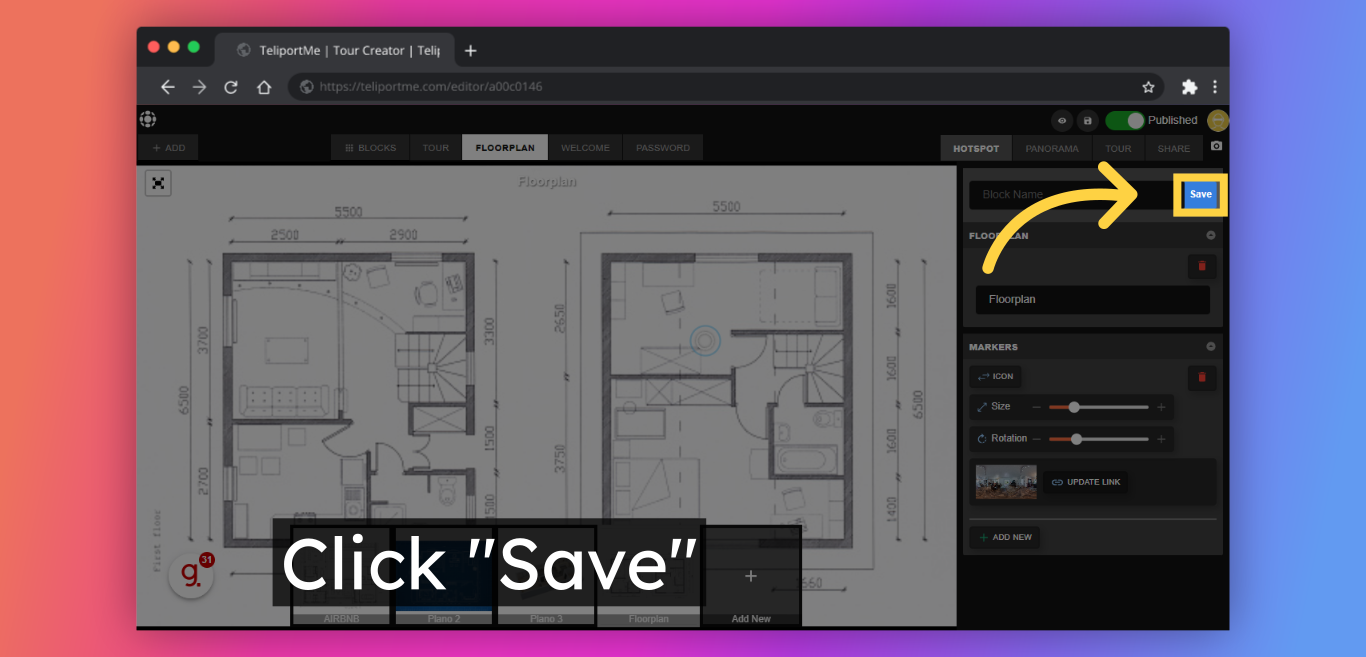
15. Click "Save" to update the floor plan on the tour.
Follow Teliportme:
🌐 Explore TeliportMe: https://www.teliportme.com
🚀 Check out our Features: https://www.teliportme.com/features
📚 Read our Blog: https://www.teliportme.com/blog
▶️ Check our channel: https://www.youtube.com/@TeliportMe
🛍️ Buy our Products: https://www.teliportme.com/pricing
📸 TIPS in our group https://www.facebook.com/groups/virtu...