As you are creating your 360 tours, one of the most important parts is connecting the panoramas. To make this easy we are introducing the navigation mode which will allow you to automatically align all the panoramas so that when you connect them the movement feels natural
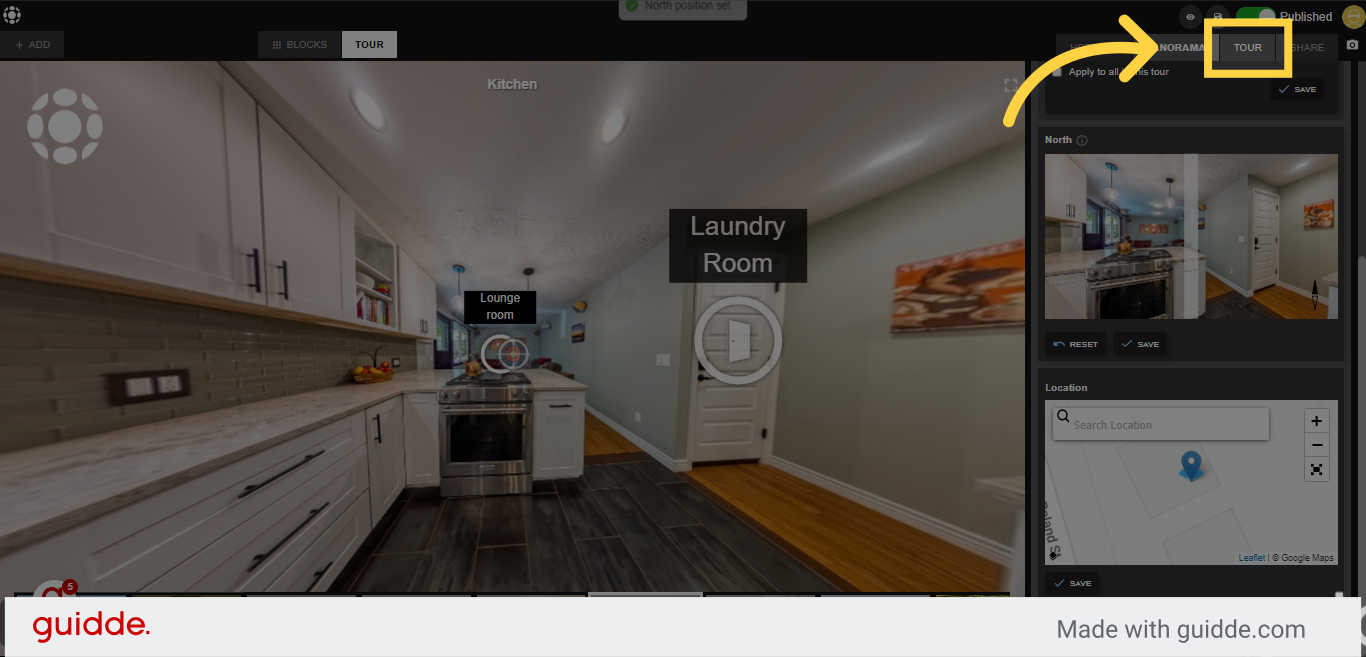
Once you set up your north you need to select the navigation mode to automatic. The default is Manual. You can find that setting right now on the Share Tour page.
Check out this 15 seconds guide to add Automatic Navigation Mode to your entire virtual tour!
|

Go to your dashboard after you have logged into teliportme.com
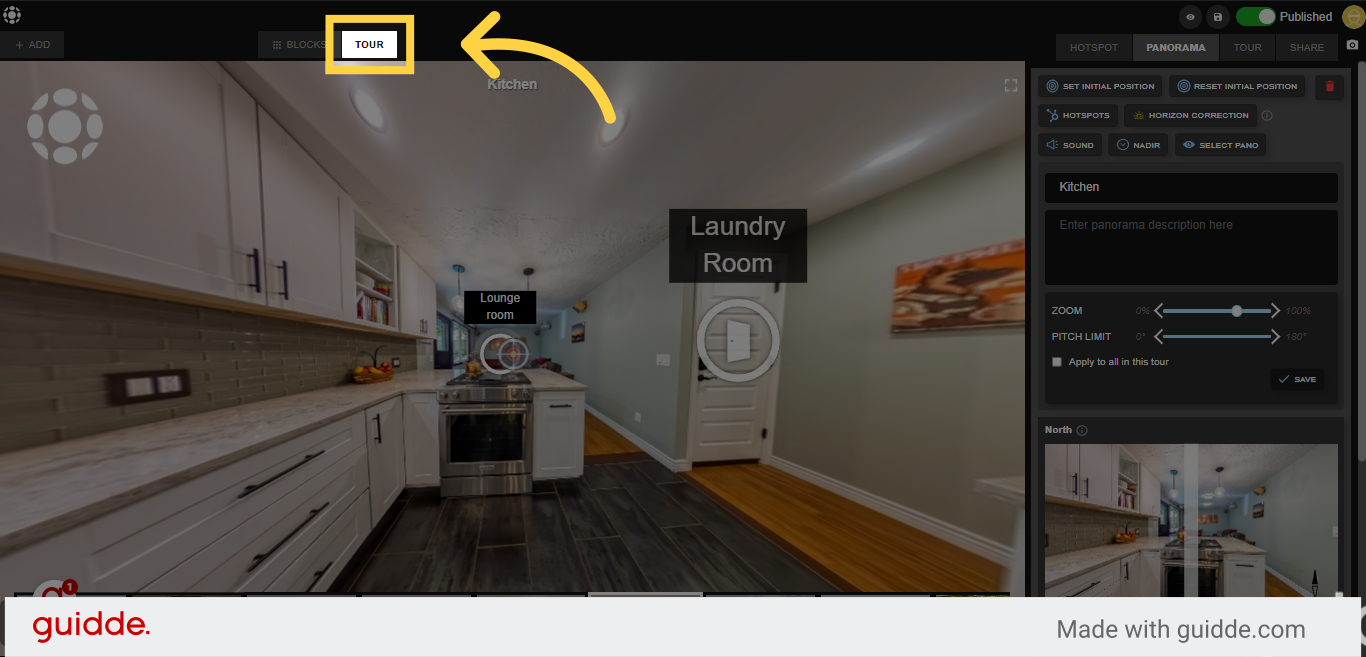
1. Click "tour"
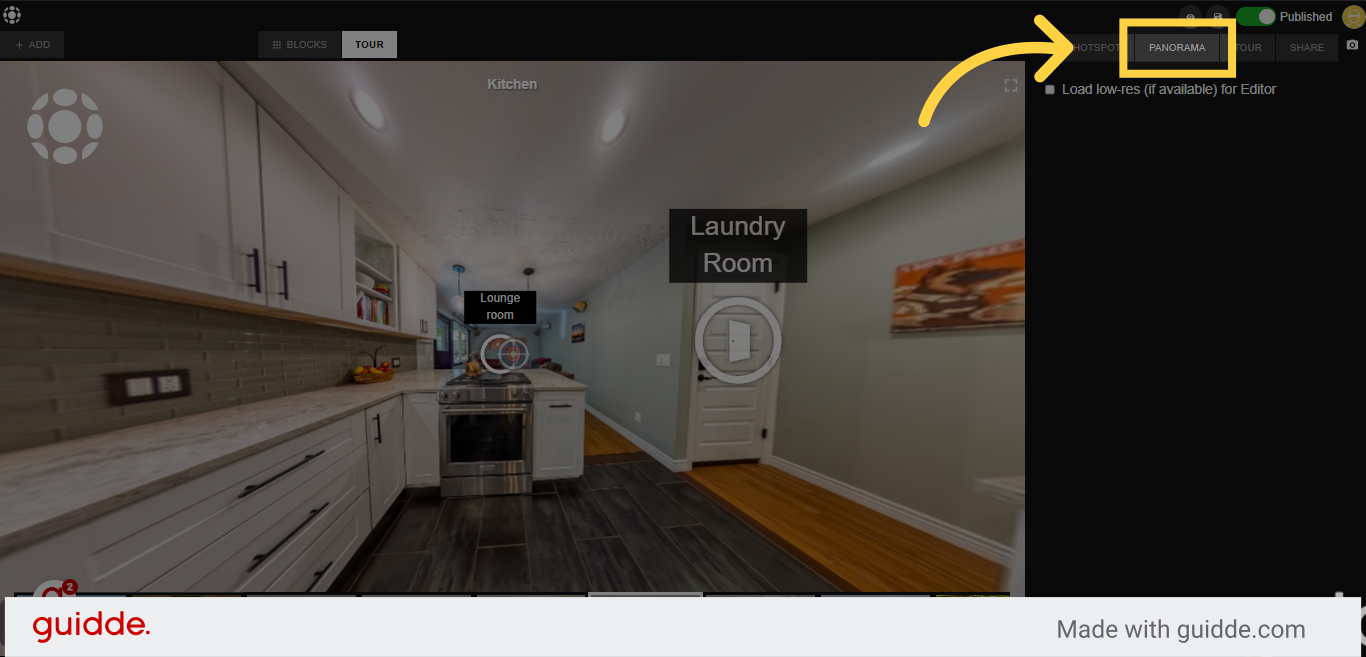
2. Click "Panorama"
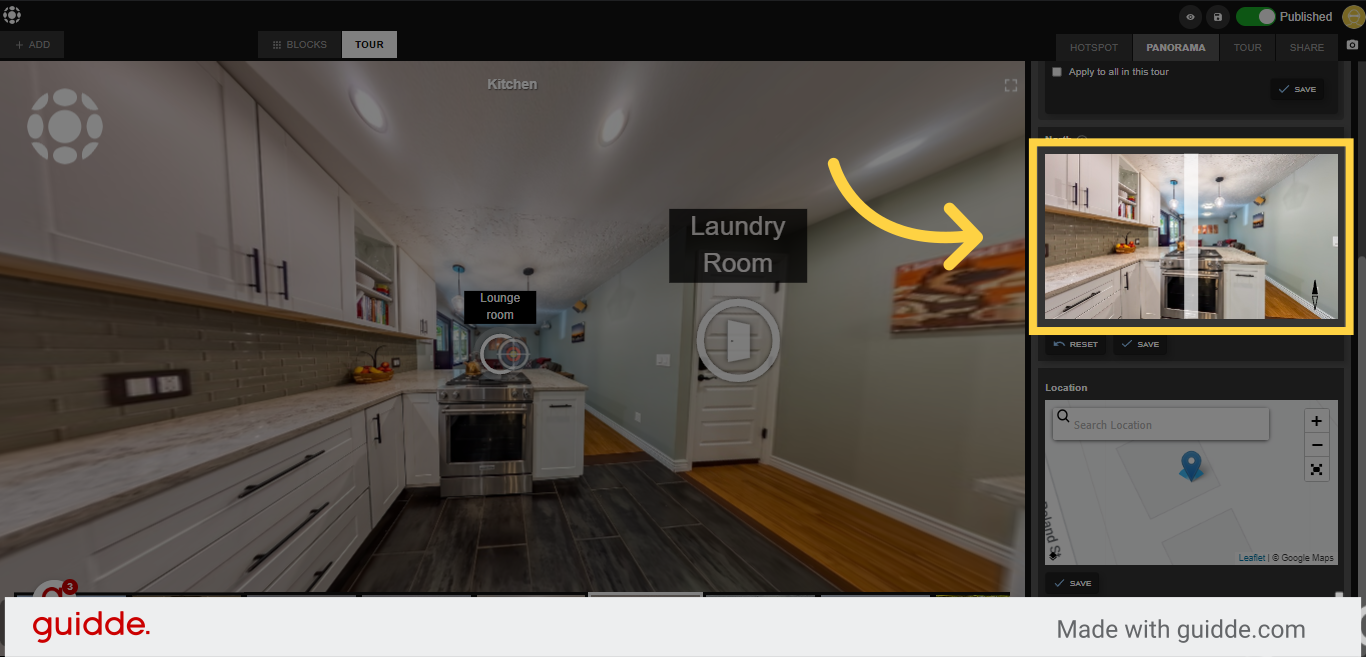
3. Remember to edit the north view of each panorama first, for a smoother navigation experience at the end of the tour.
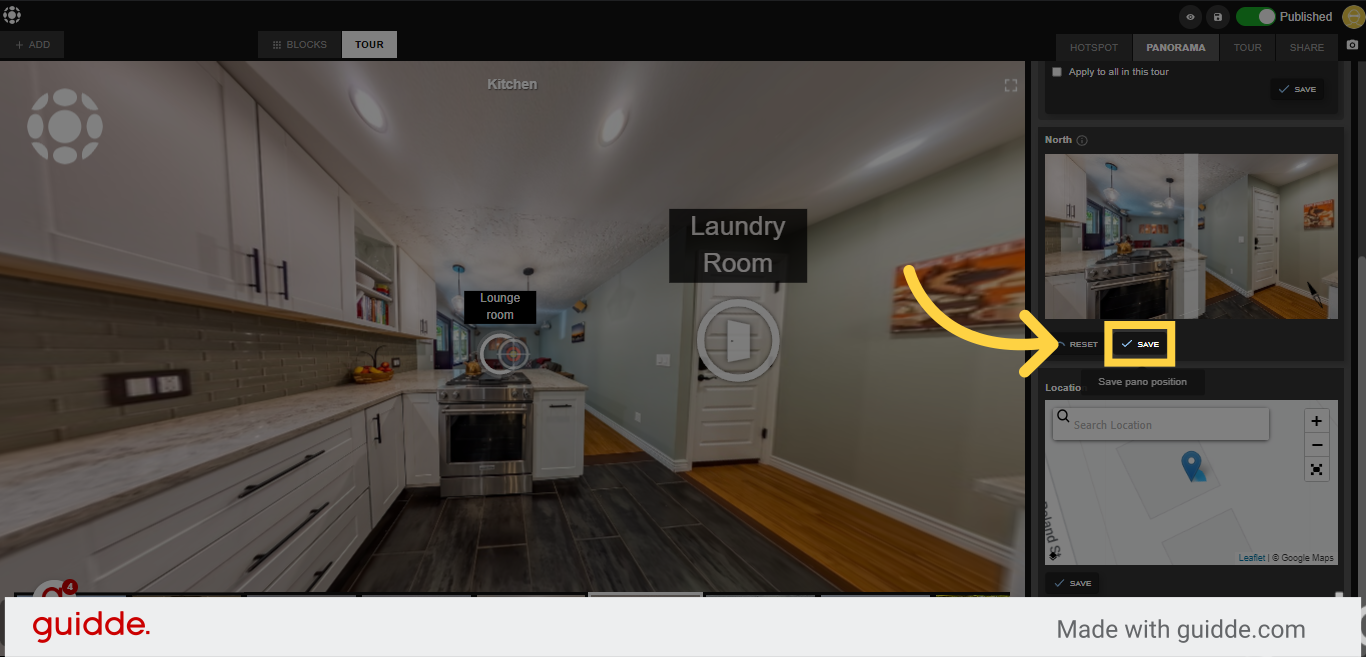
4. Click "Save"
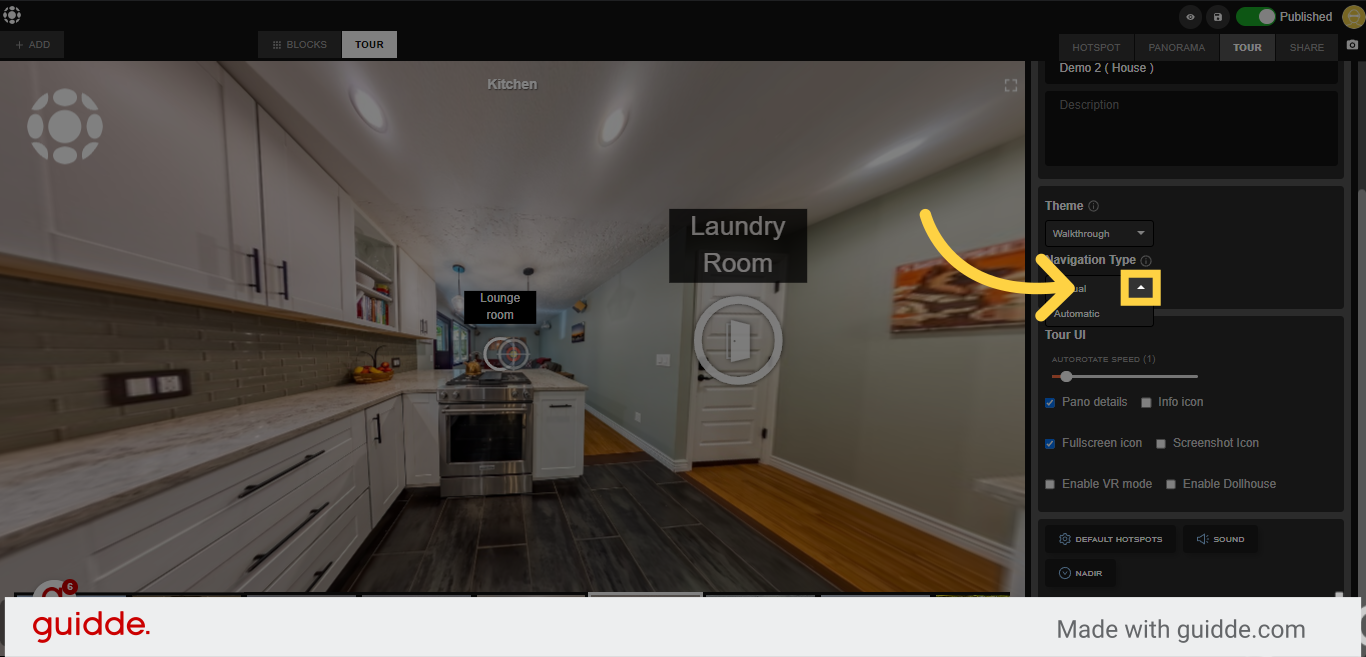
5. Click on the tab "Tour"
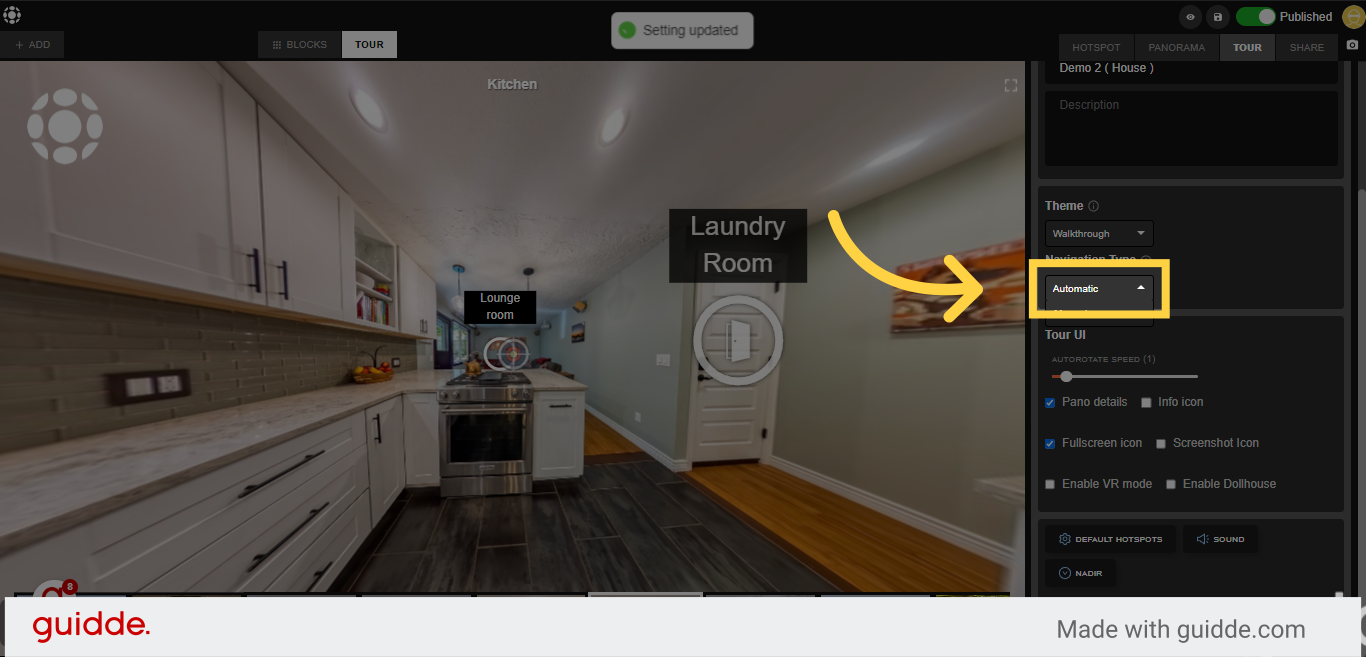
6. At the tour tab, you can view the navigation mode option and choose the type for your tour - either automatic or manual.
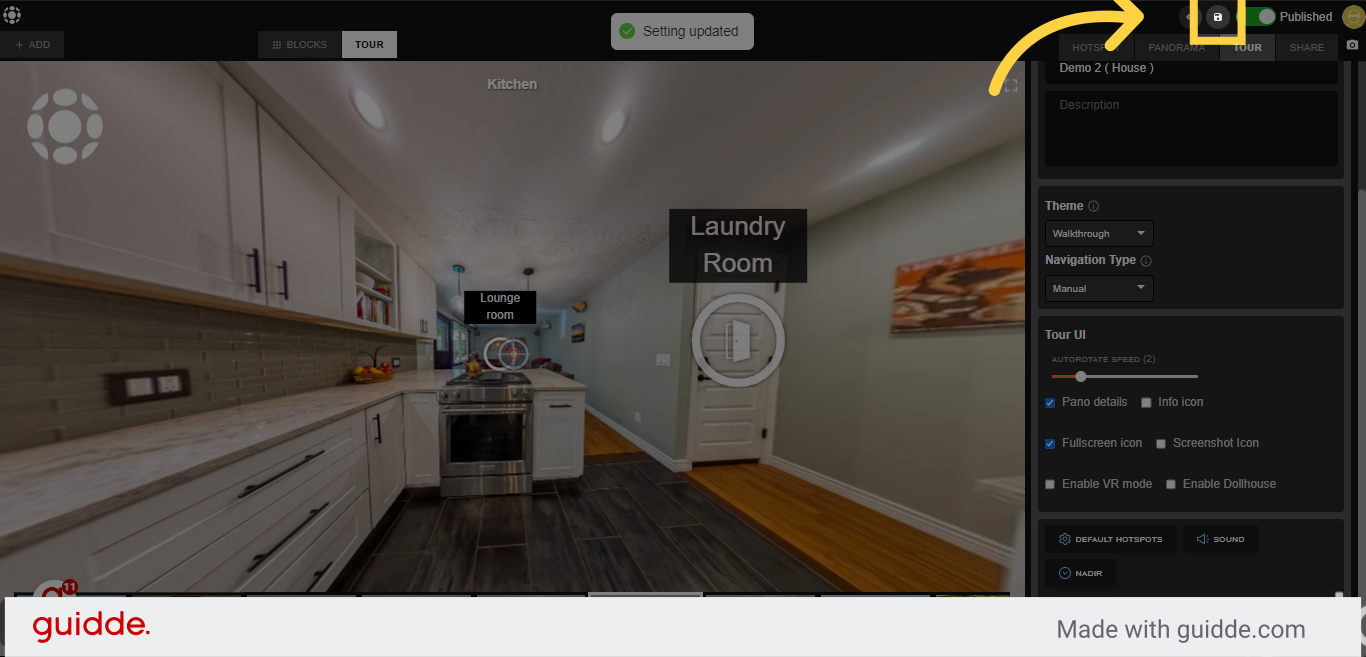
11. You can also give one final touch and that is to adjust the rotation speed so that no detail is lost.

12. Click "save"
Check out our video tutorial:
Follow Teliportme:
🌐 Explore TeliportMe: https://www.teliportme.com
🚀 Check out our Features: https://www.teliportme.com/features
📚 Read our Blog: https://www.teliportme.com/blog
▶️ Check our channel: https://www.youtube.com/@TeliportMe
🛍️ Buy our Products: https://www.teliportme.com/pricing
📸 TIPS in our group https://www.facebook.com/groups/virtu...