Welcome screens are a great way to engage your viewers from the start and set the tone for your 3D tour. By providing information about your company, products, or services, you can give visitors a quick overview of everything you have to offer and help orient them to what's to come.

Check out this 54 seconds guide to set up a Welcome screen in your 360 tours!

Go to your dashboard after you have logged into teliportme.com
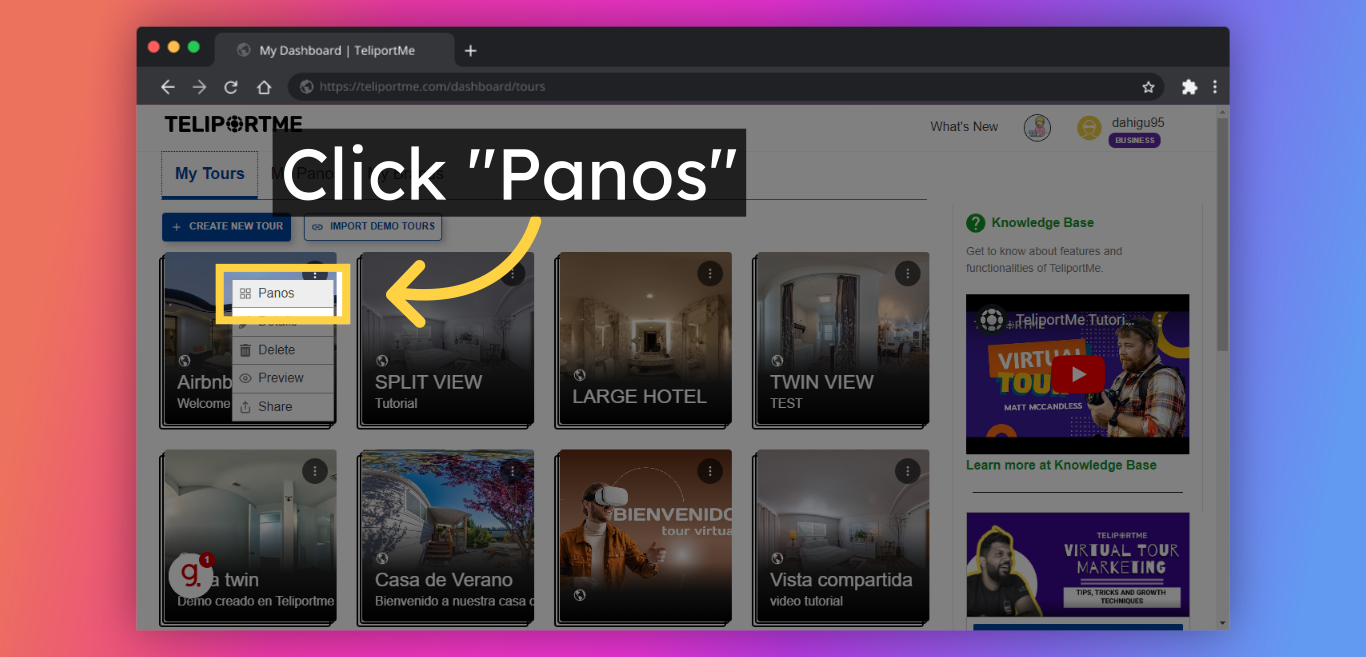
1. Click "My Tours".

2. Click "Panos" or on the tour, you want to add a welcome screen.
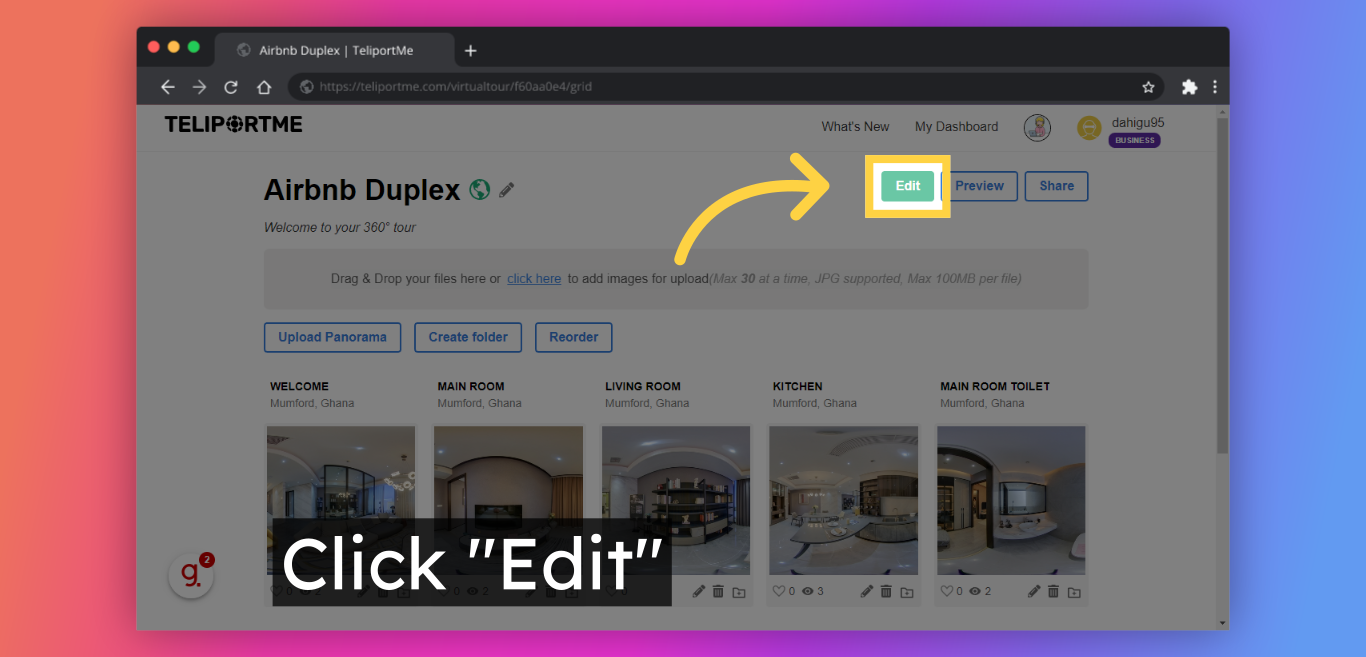
3. Click "Edit".
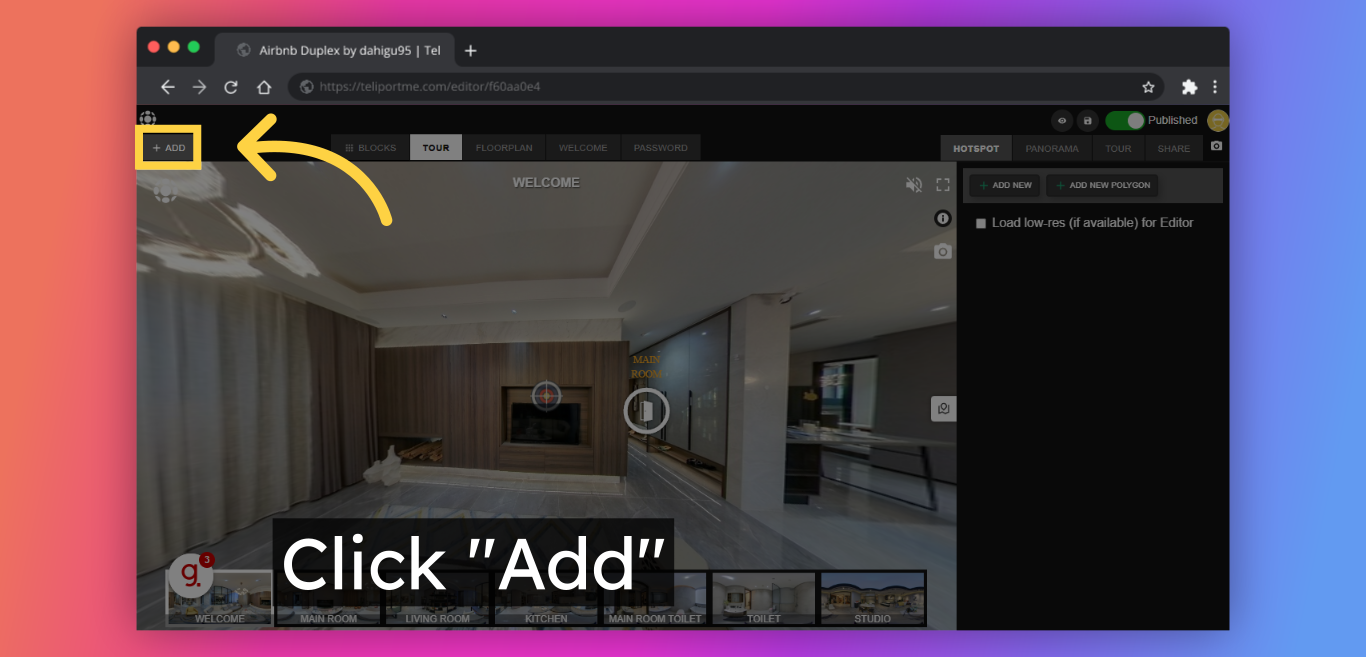
4. Click "Add" to select the welcome screen block.
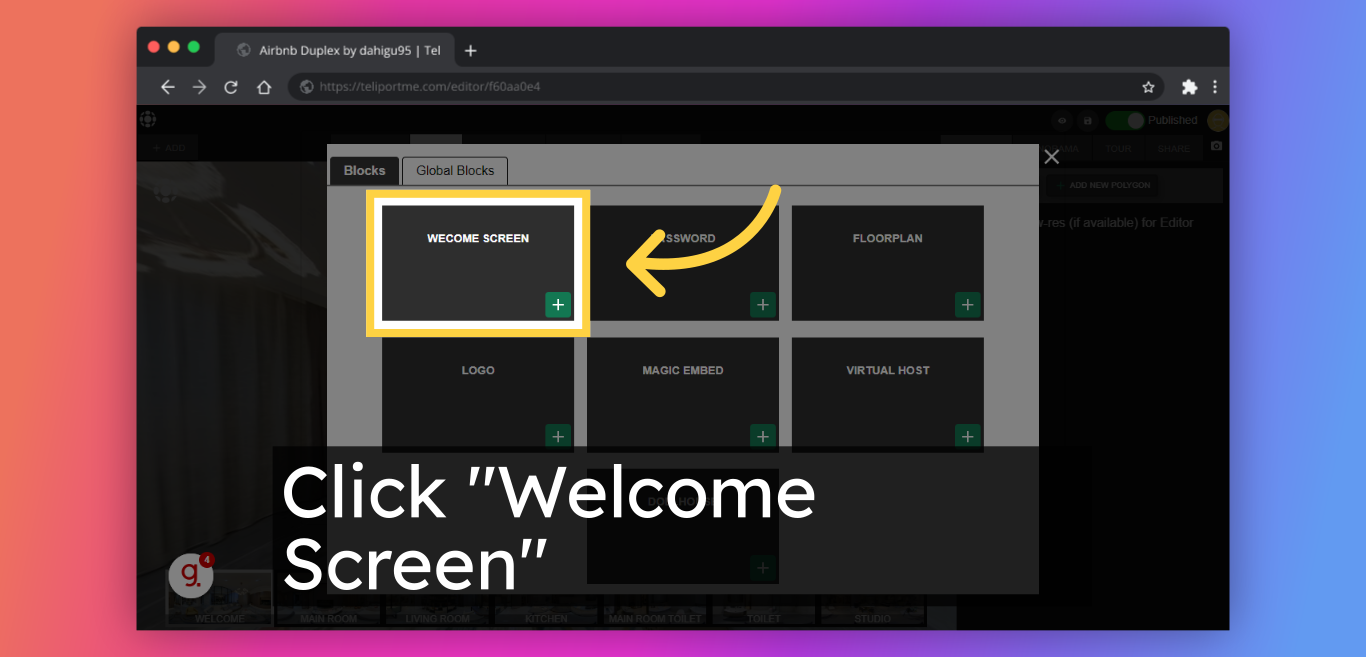
5. Select "Welcome Screen" and add it by selecting the "+" symbol.
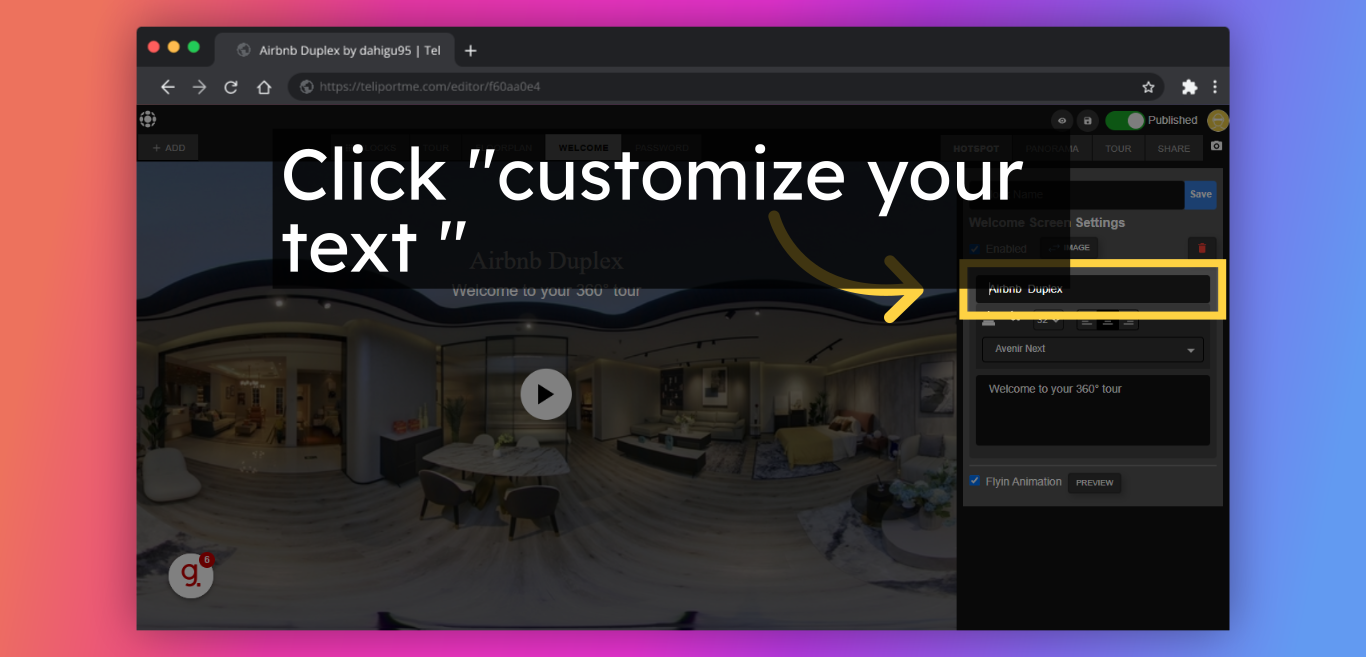
6. Fill in "Customize your text ". Feel free to customize your message by changing the color and font.
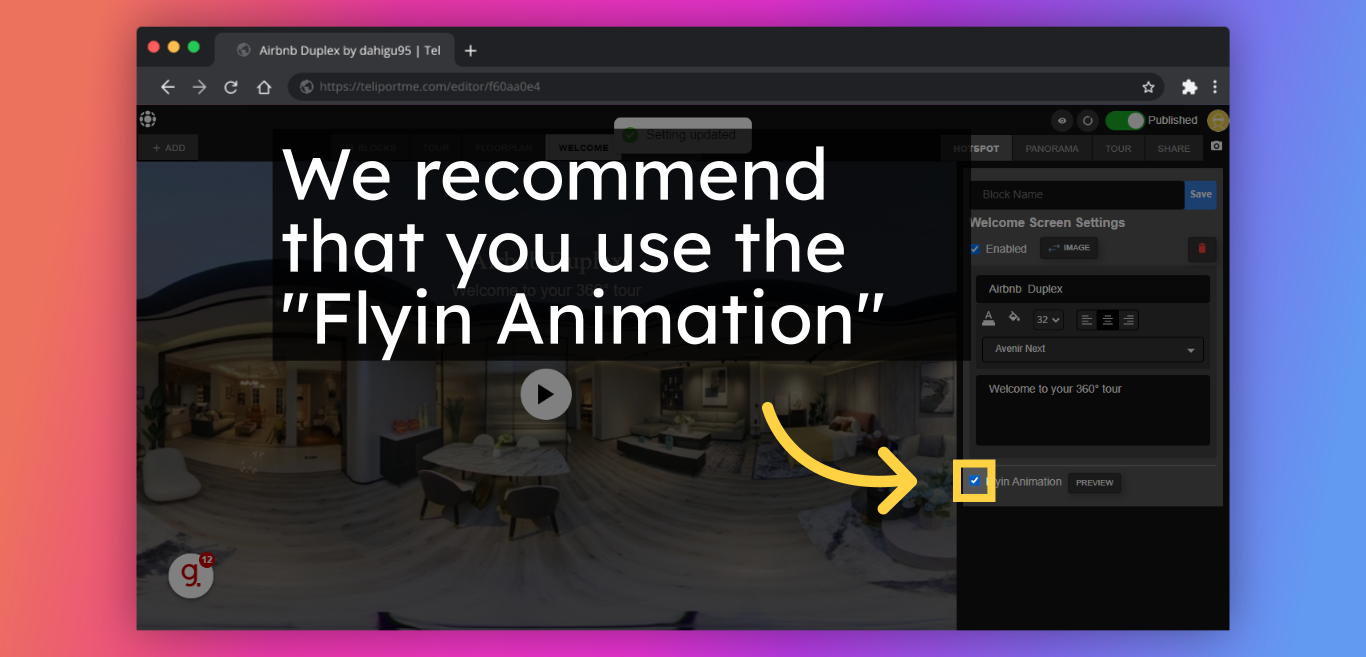
7. We recommend that you use the "Flyin Animation". if you want a dynamic opening to your 360 tour!
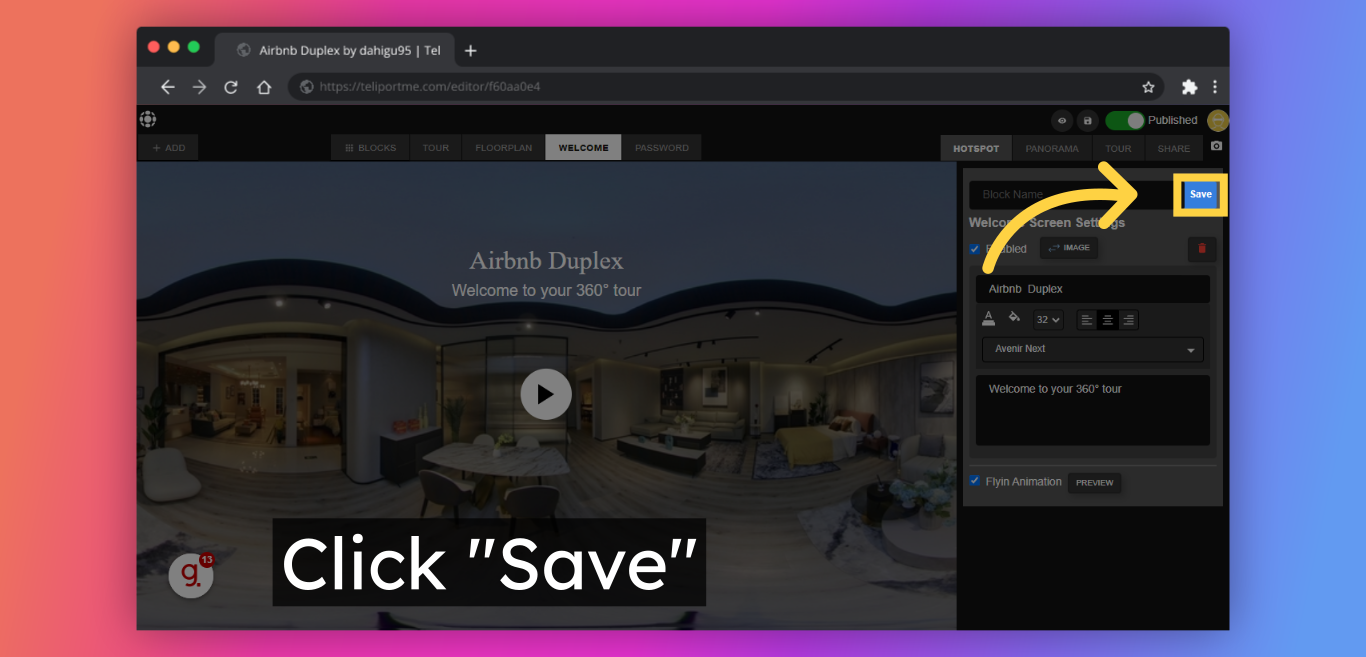
8. Click "Save" to update the welcome screen on your tour.
9. Click "Share".
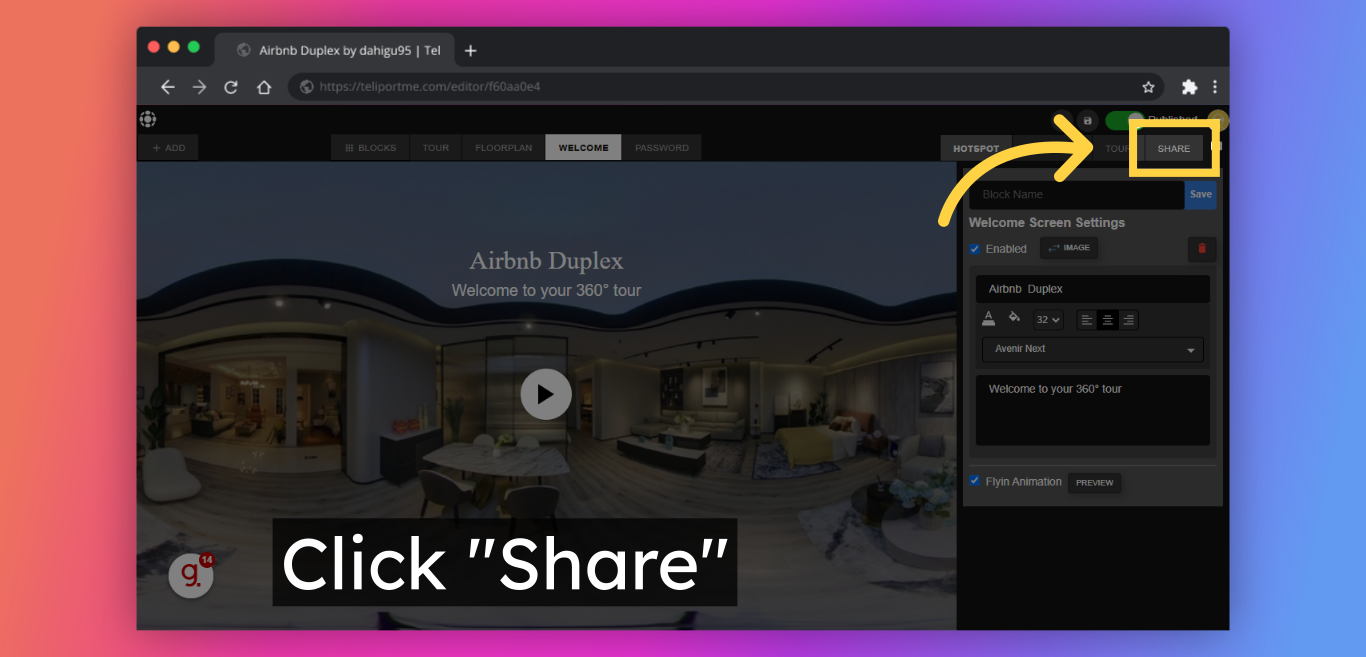
10. You'll have a link to share or copy the embed code to embed the virtual tour on your website.

Check out our video tutorial:
Follow Teliportme:
🌐 Explore TeliportMe: https://www.teliportme.com
🚀 Check out our Features: https://www.teliportme.com/features
📚 Read our Blog: https://www.teliportme.com/blog
▶️ Check our channel: https://www.youtube.com/@TeliportMe
🛍️ Buy our Products: https://www.teliportme.com/pricing
📸 TIPS in our group https://www.facebook.com/groups/virtu...