Why do you need virtual tours that are password-protected?
Password-protected virtual tours would work great if you have a project that you want to show your client in different stages. When you finish editing your tour, you can decide to share it publicly (just change the privacy settings for the tour), but until then, you might want to keep it password-protected so that it's not available to anyone.
See the guide below to learn how you can add a password to your 360 tours:
Go to your dashboard after you have logged into teliportme.com
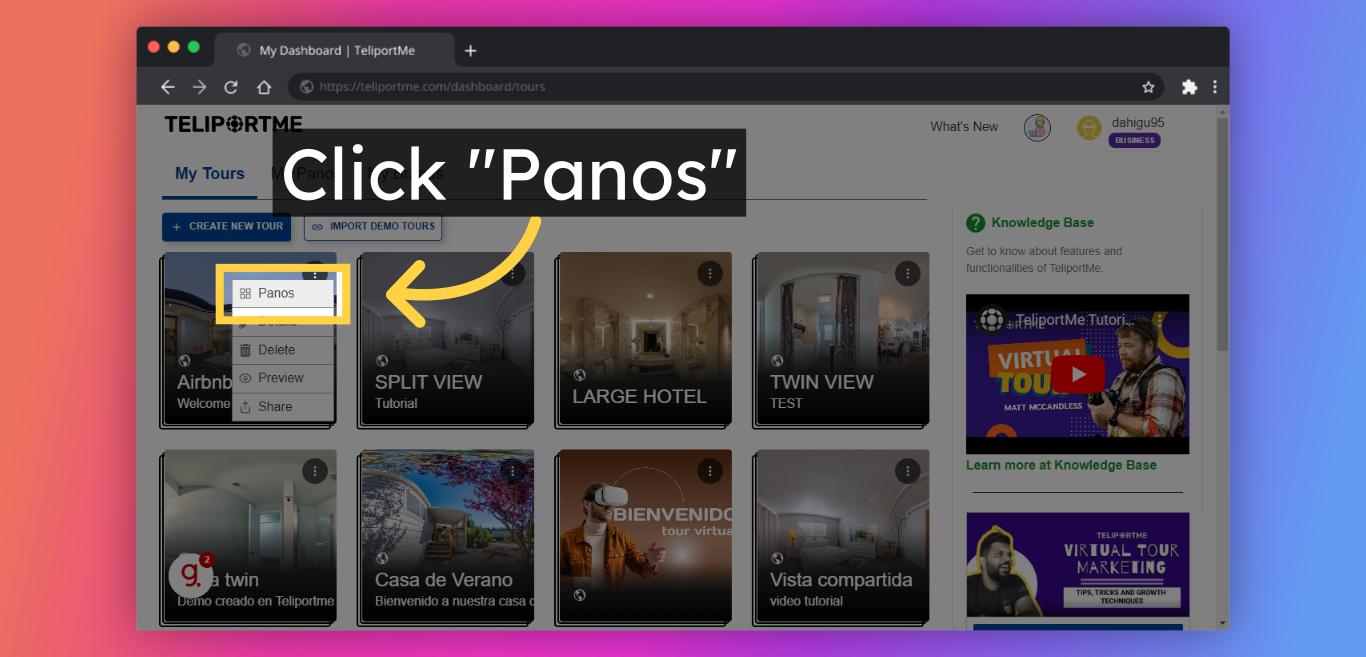
1. Click "Panos" or on the tour you want to add a password.
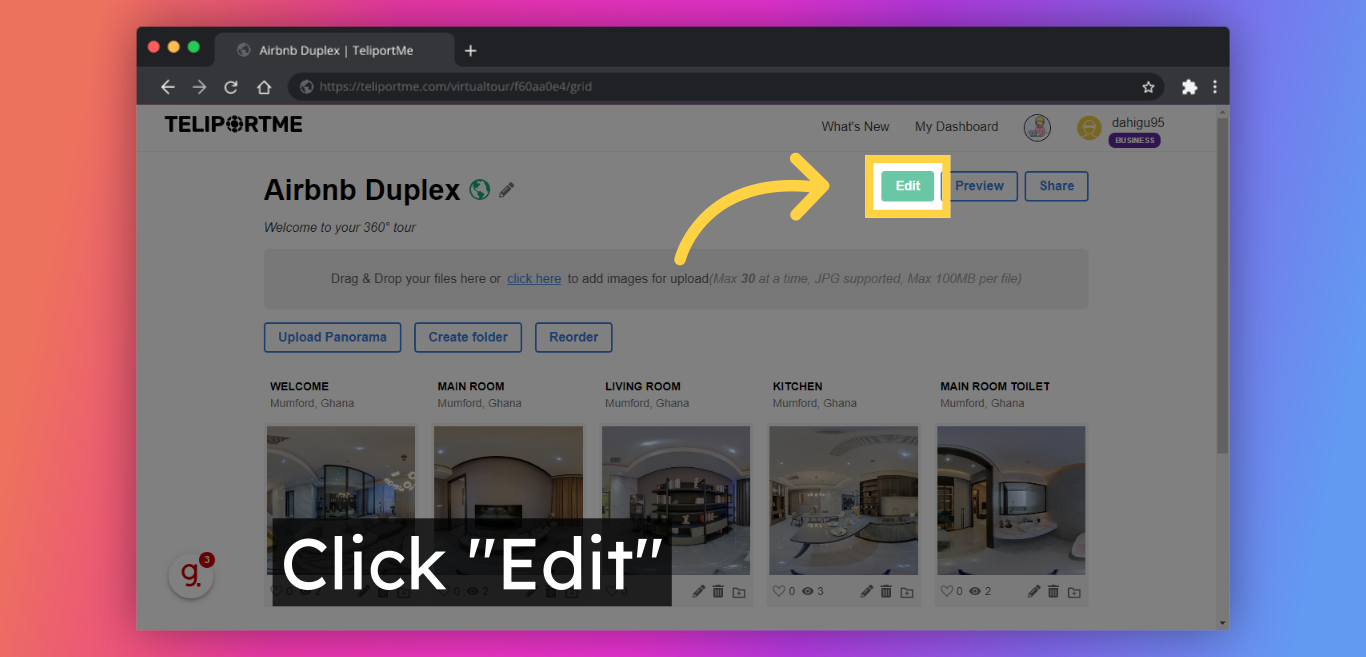
2. Click "Edit".
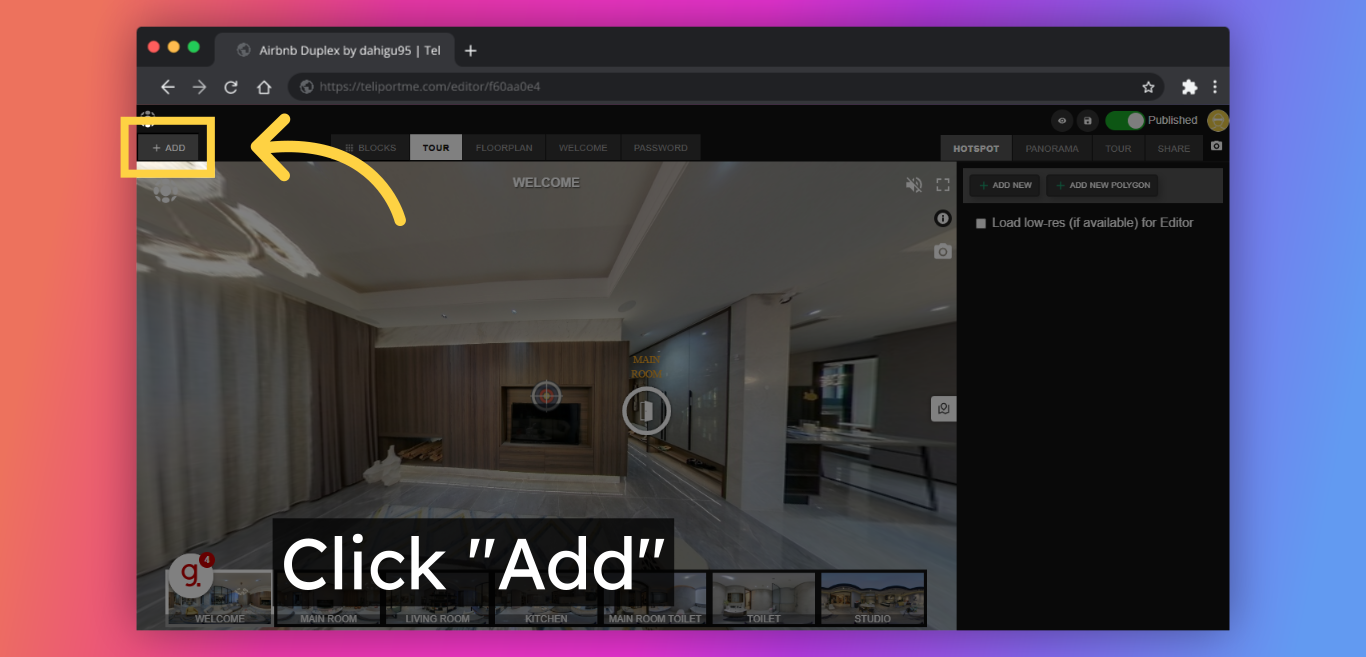
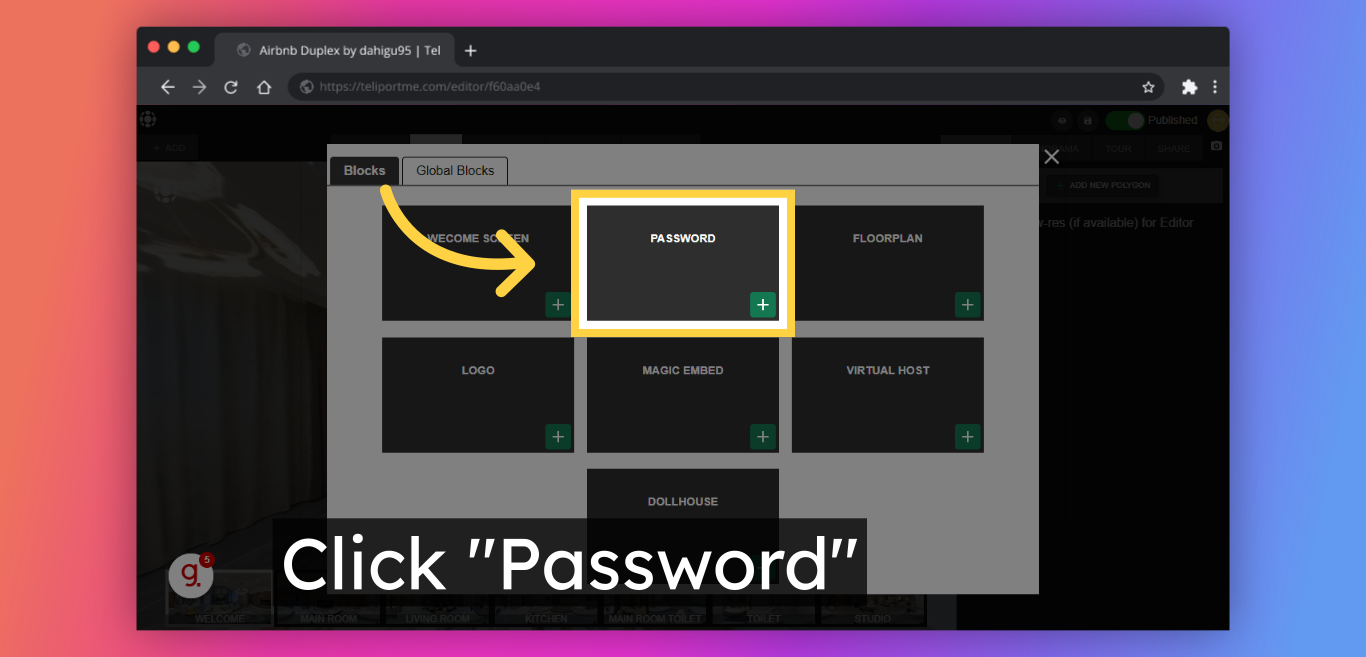
3. Click "Add" in this top right-hand box to view the blocks.
4. Select the "Password" block and add it by selecting the plus symbol.
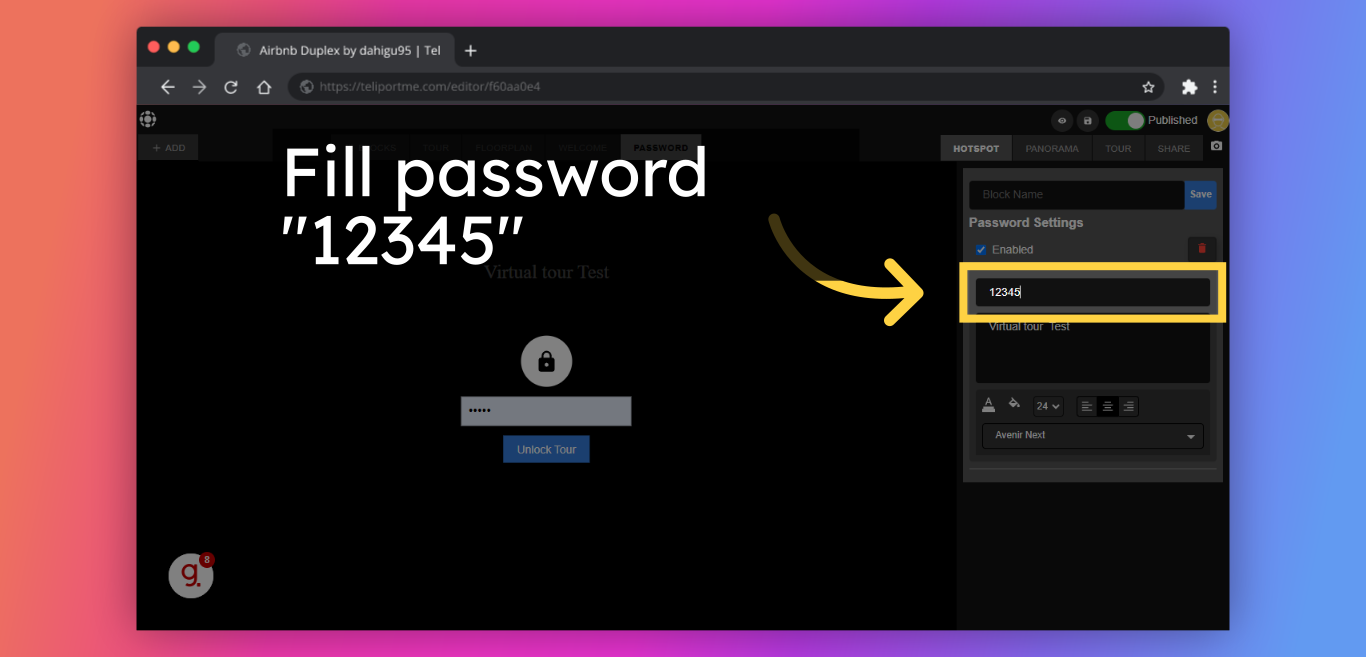
5. Add your password for the tour (in this case we use "12345" as an example)
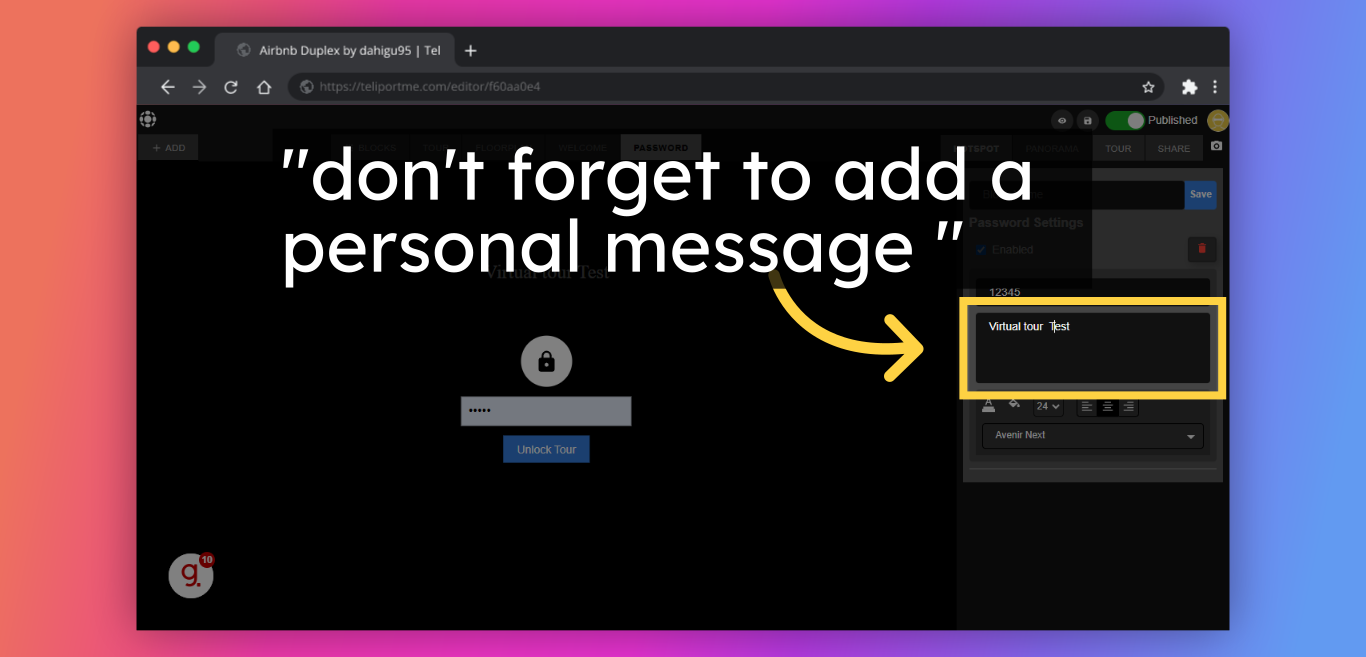
6. Don't forget to add a personal message so that anyone viewing can either contact you for the password or know that this is tour is password protected.
7. Click on "save" to keep your changes to the tour up-to-date.

Additionally, it is important to keep your password safe, and not to share it with unauthorized individuals.
Follow Teliportme:
🌐 Explore TeliportMe: https://www.teliportme.com
🚀 Check out our Features: https://www.teliportme.com/features
📚 Read our Blog: https://www.teliportme.com/blog
▶️ Check our channel: https://www.youtube.com/@TeliportMe
🛍️ Buy our Products: https://www.teliportme.com/pricing
📸 TIPS in our group https://www.facebook.com/groups/virtu...