Twin View is a fantastic feature that allows you to provide your audience with a side-by-side view of two different perspectives within the same virtual tour. Whether you want to showcase before and after images, compare different locations, or highlight specific details, Twin View adds a whole new level of interactivity and engagement.
Check out this 45 seconds guide to set up a twin view in your virtual tour!

Go to your dashboard after you have logged into teliportme.com
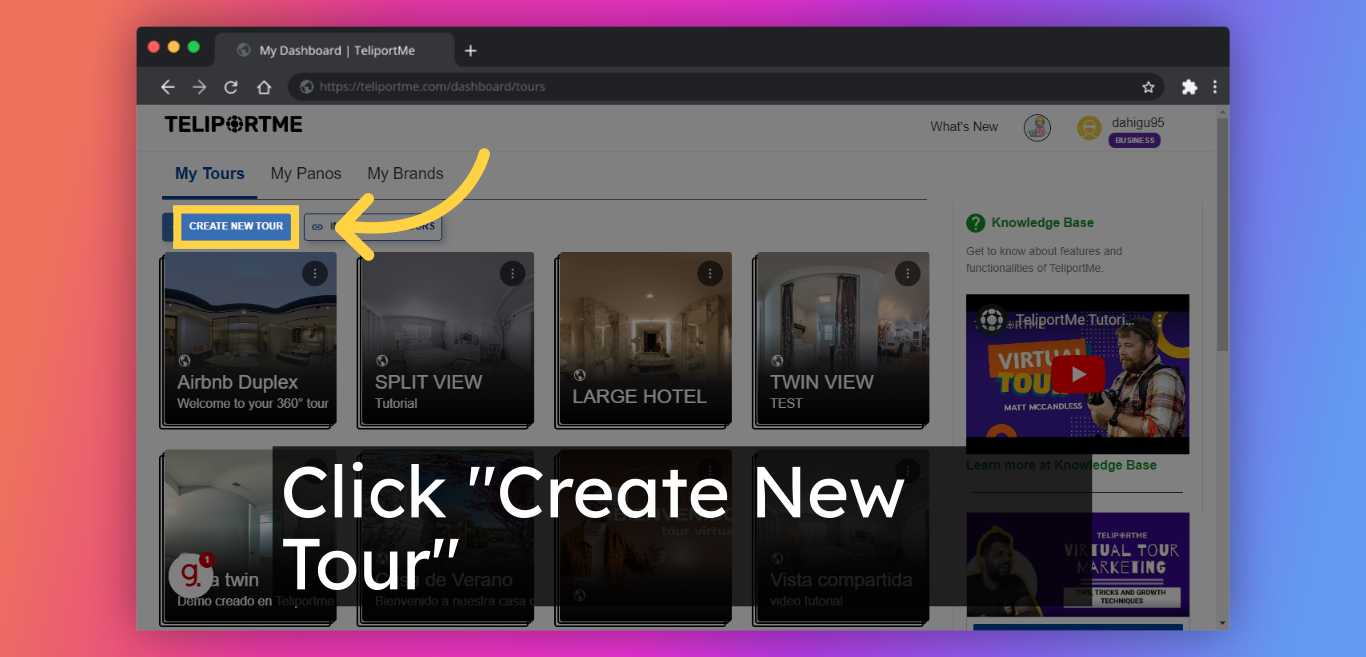
1. Click "Create New Tour".
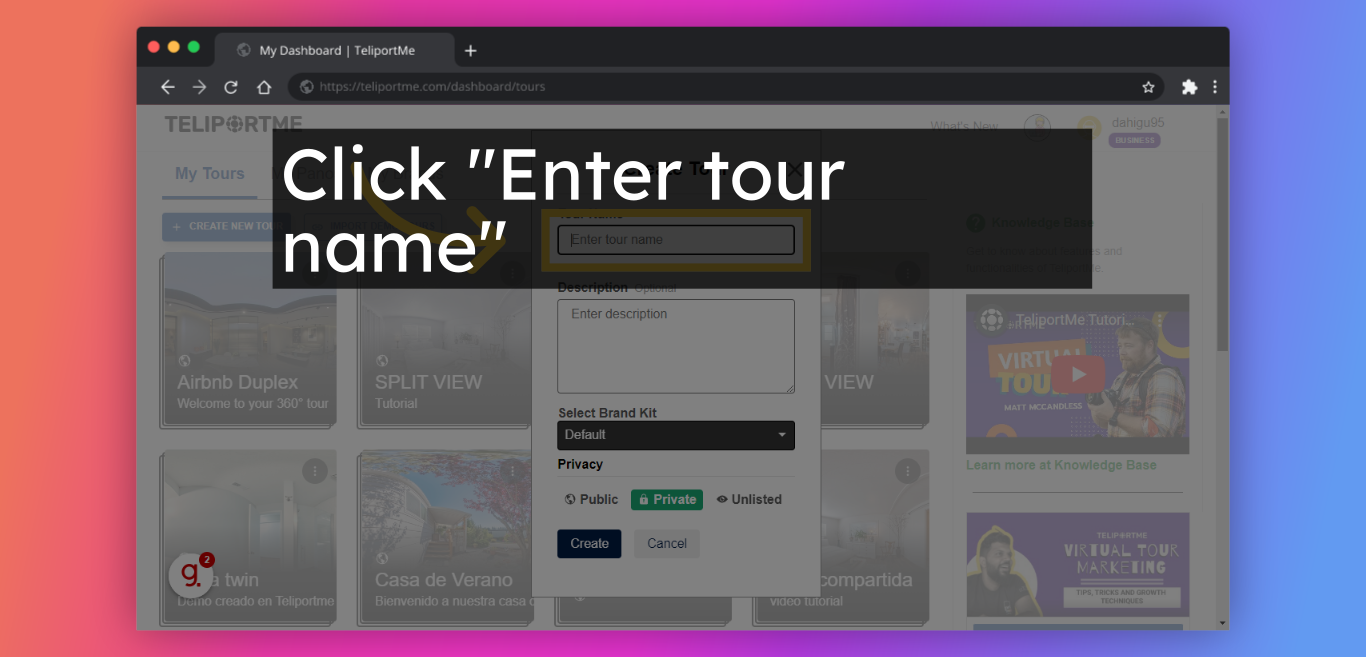
2. Fill in the name box "Enter tour name".
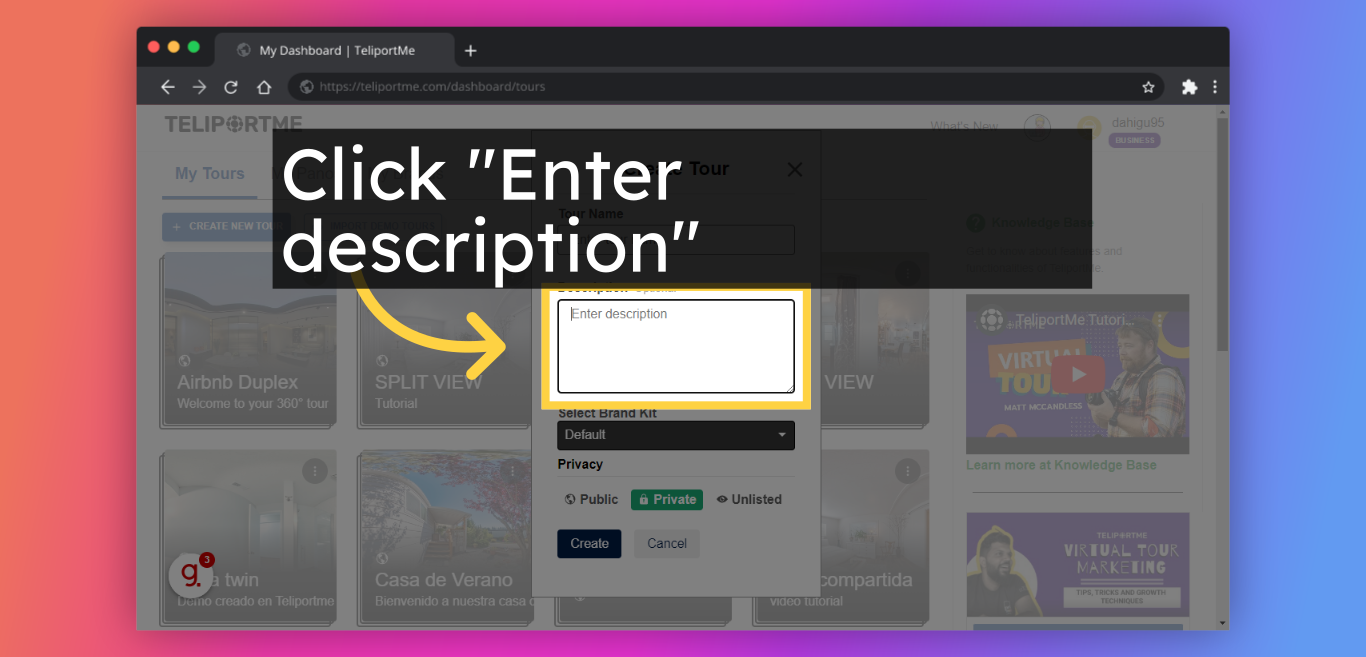
3. Fill in "Enter description".
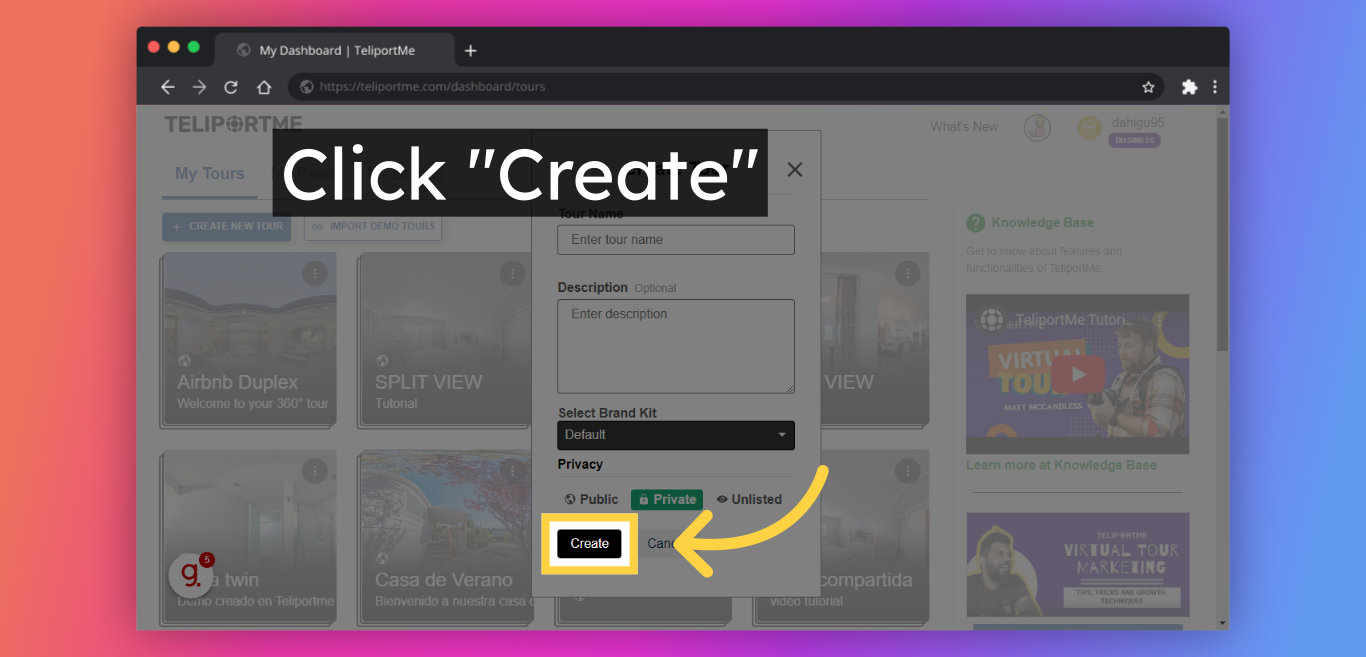
4. Click "Create".
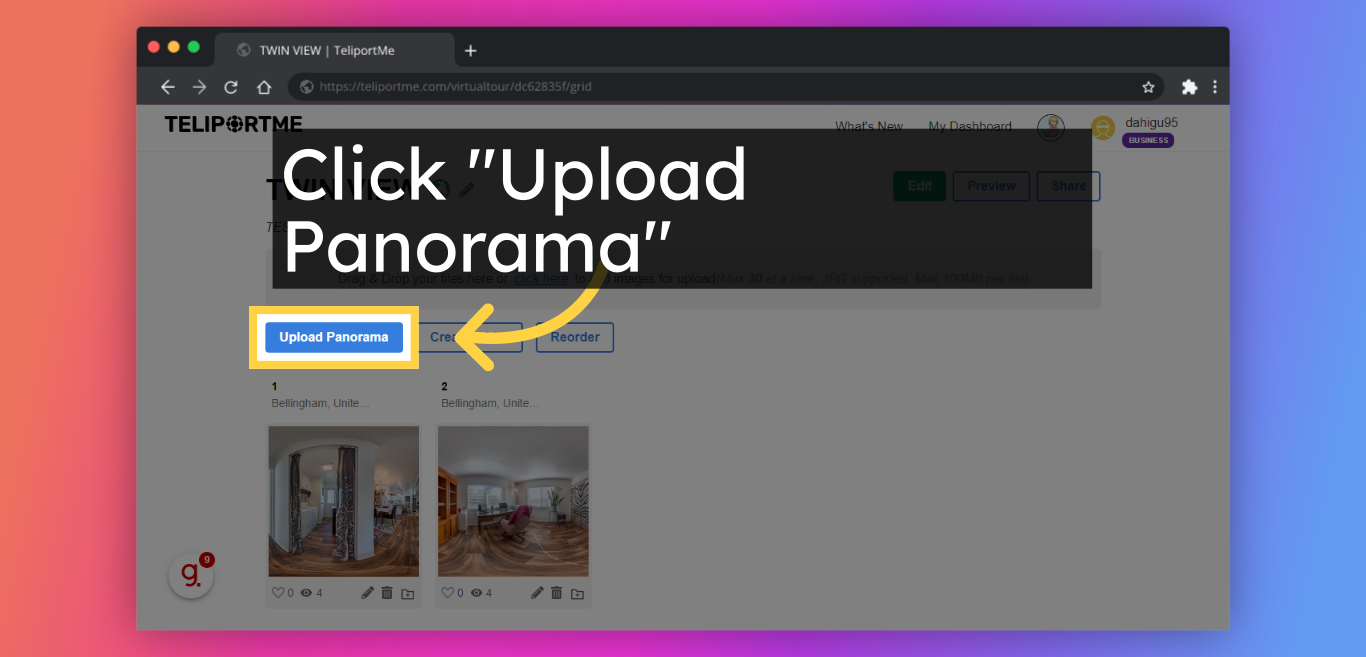
5. "Upload Panorama" you require in twin view. Remember to add at least two panoramas to create the twin view.
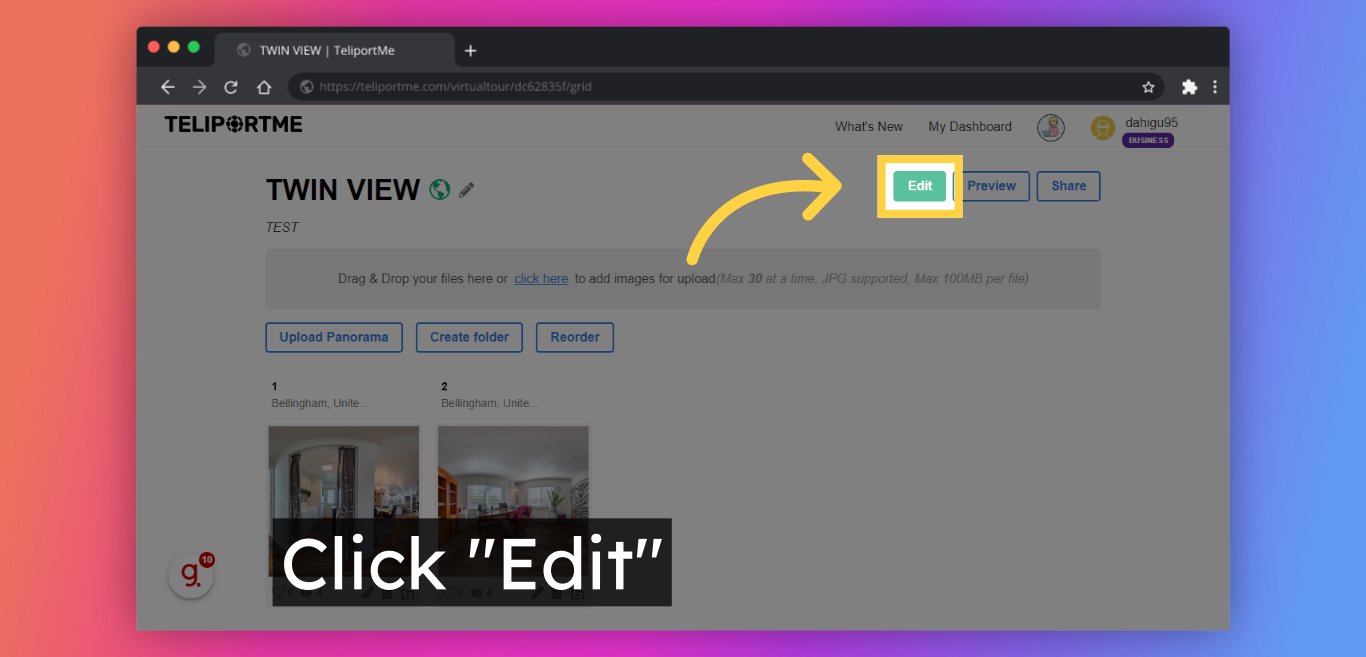
6. Click "Edit".
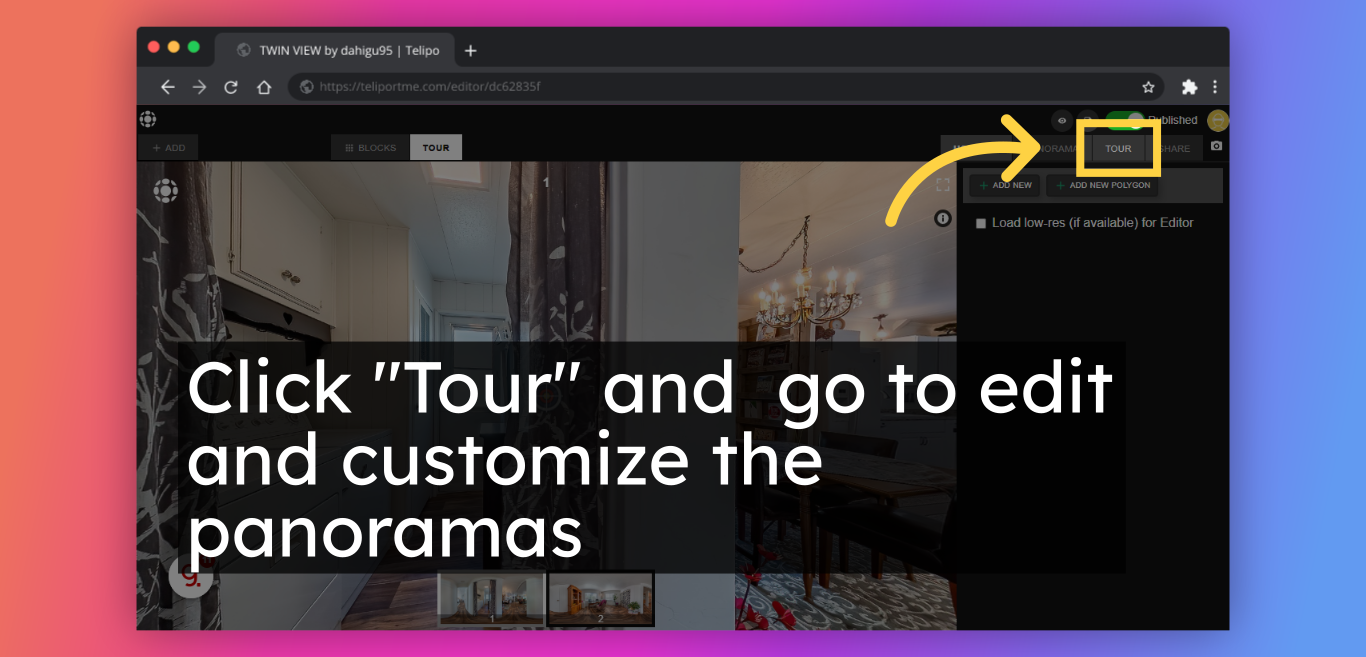
7. Click the "Tour" tab and go to edit and customize the panoramas by making sure that the initial position is the same in both panoramas.
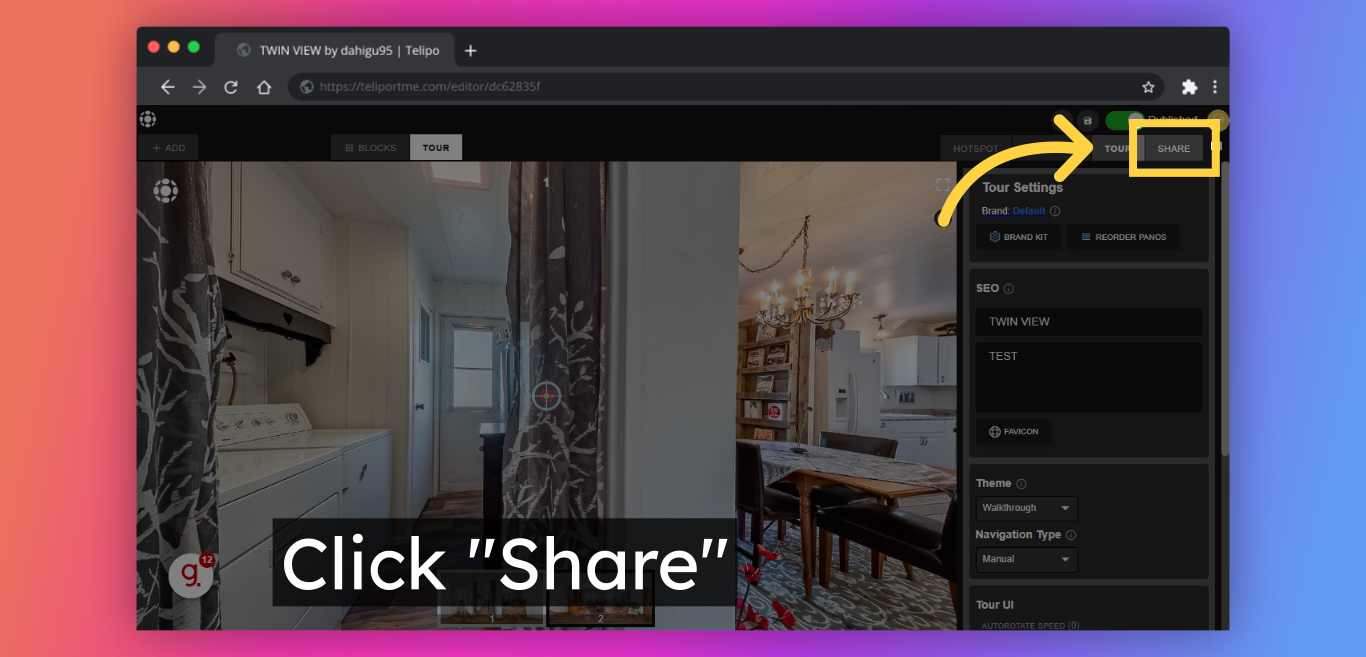
8. Click "Share".
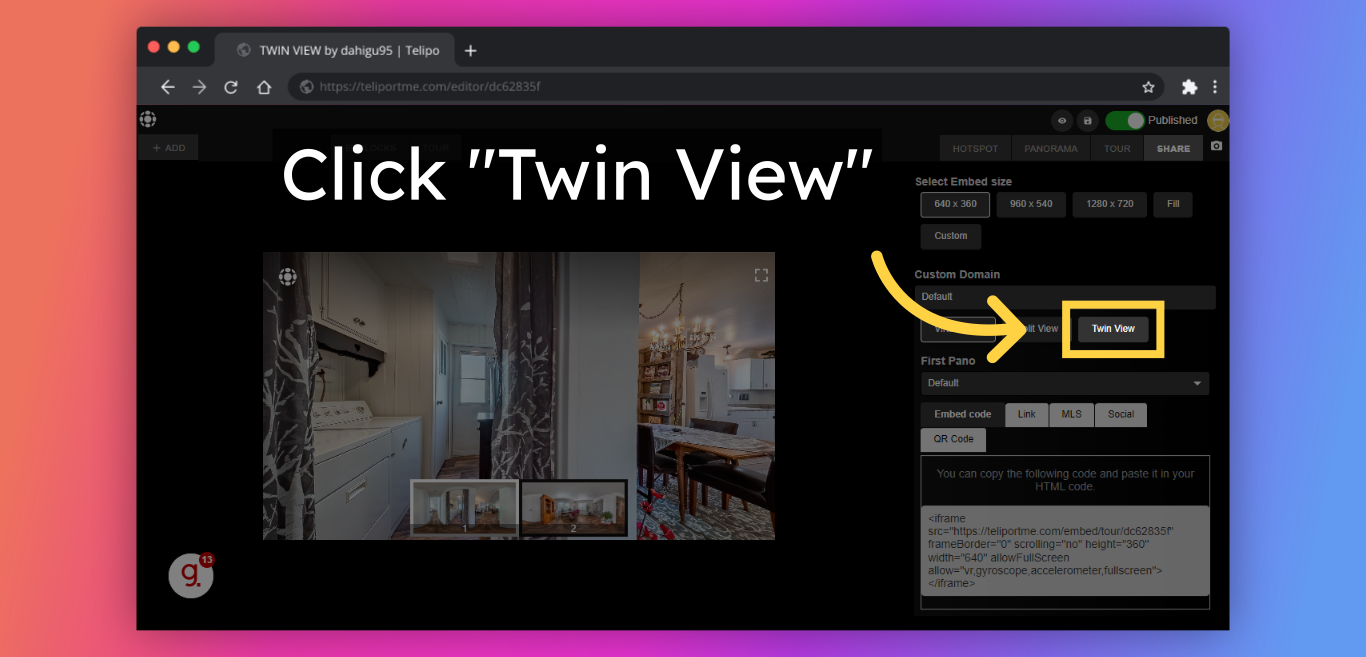
9. Click "Twin View". Be sure to choose the twin view option to get the look you want.
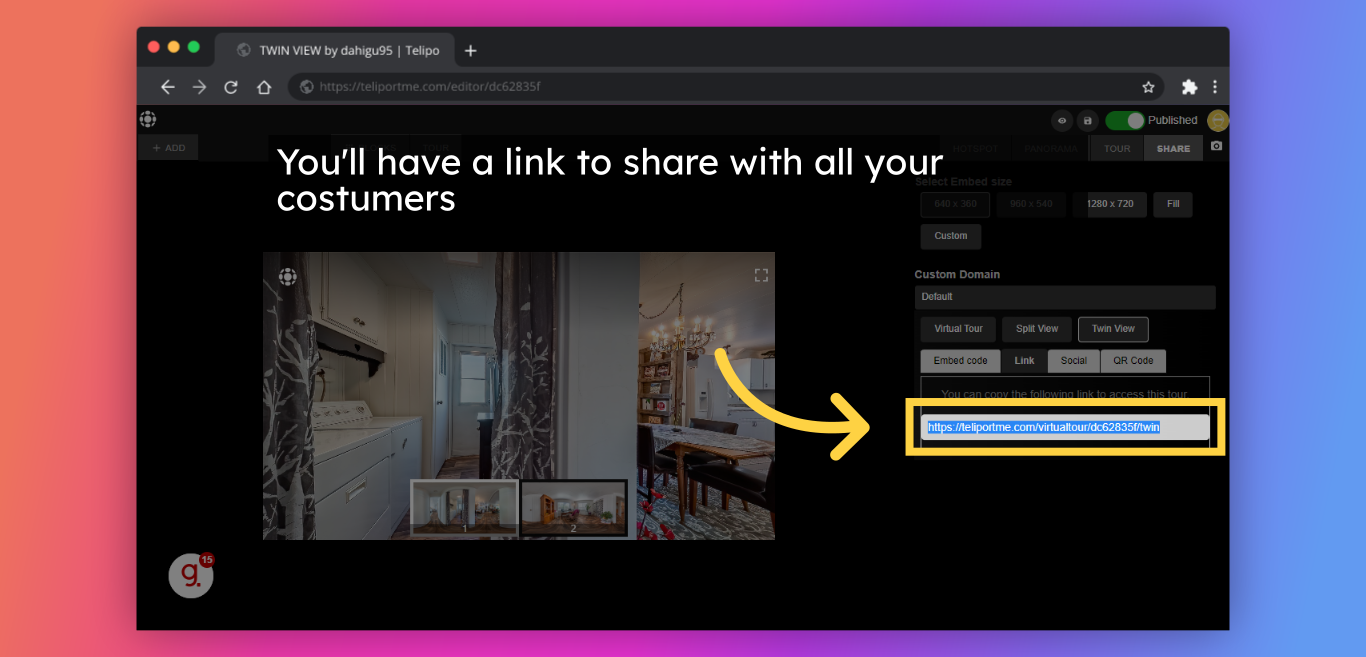
10. Copy this "Link" to easily share or copy the embed code to embed the Twin view on your website - it's that simple!
Check out this sample:
Follow Teliportme:
🌐 Explore TeliportMe: https://www.teliportme.com
🚀 Check out our Features: https://www.teliportme.com/features
📚 Read our Blog: https://www.teliportme.com/blog
▶️ Check our channel: https://www.youtube.com/@TeliportMe
🛍️ Buy our Products: https://www.teliportme.com/pricing
📸 TIPS in our group https://www.facebook.com/groups/virtu...

