This innovative way of showing the same location at two different moments, Instead of changing the whole scene, we can now use a split view feature to see both stages at the same time in a split view.
Present two panoramas at the same time, side by side in all their interactive glory. Think Before /After, Day/Night, Summer/Winter - whenever it makes sense to show a direct, immersive comparison of a scene in two stages, the split view feature is your best friend.
Check out this 54 seconds guide to set up a split view in your virtual tour!

Go to your dashboard after you have logged into teliportme.com
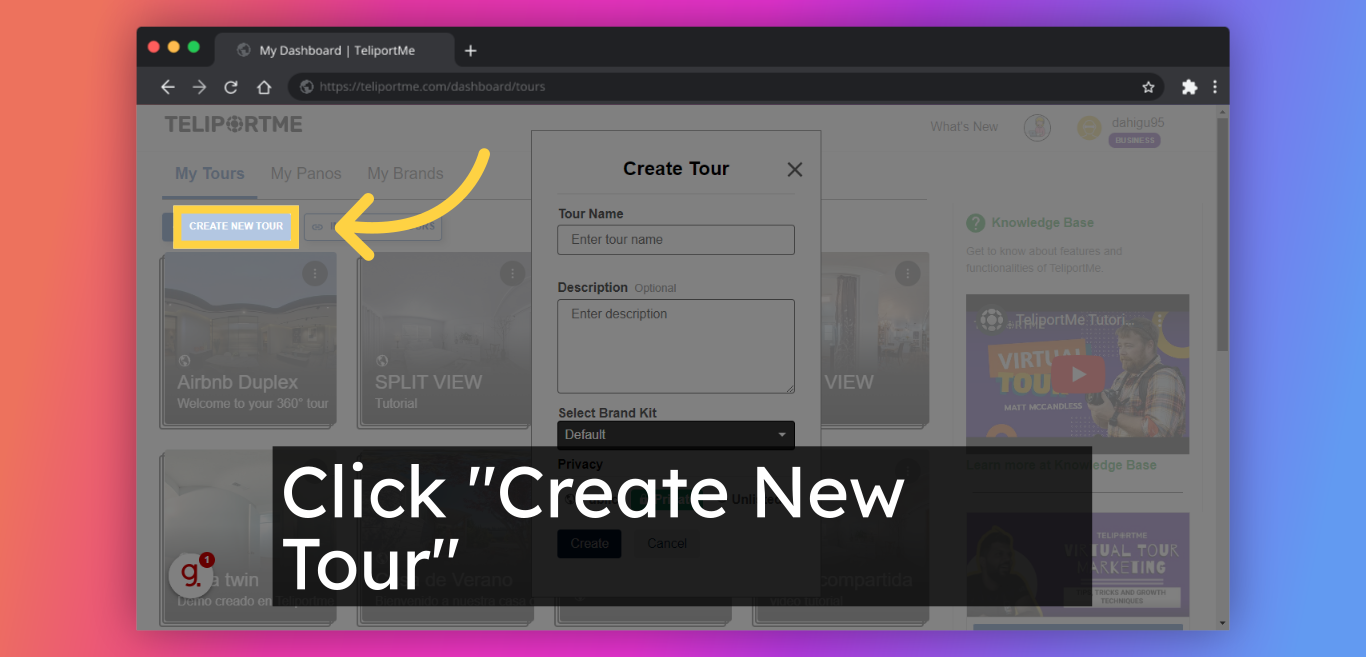
1. Click "Create New Tour".
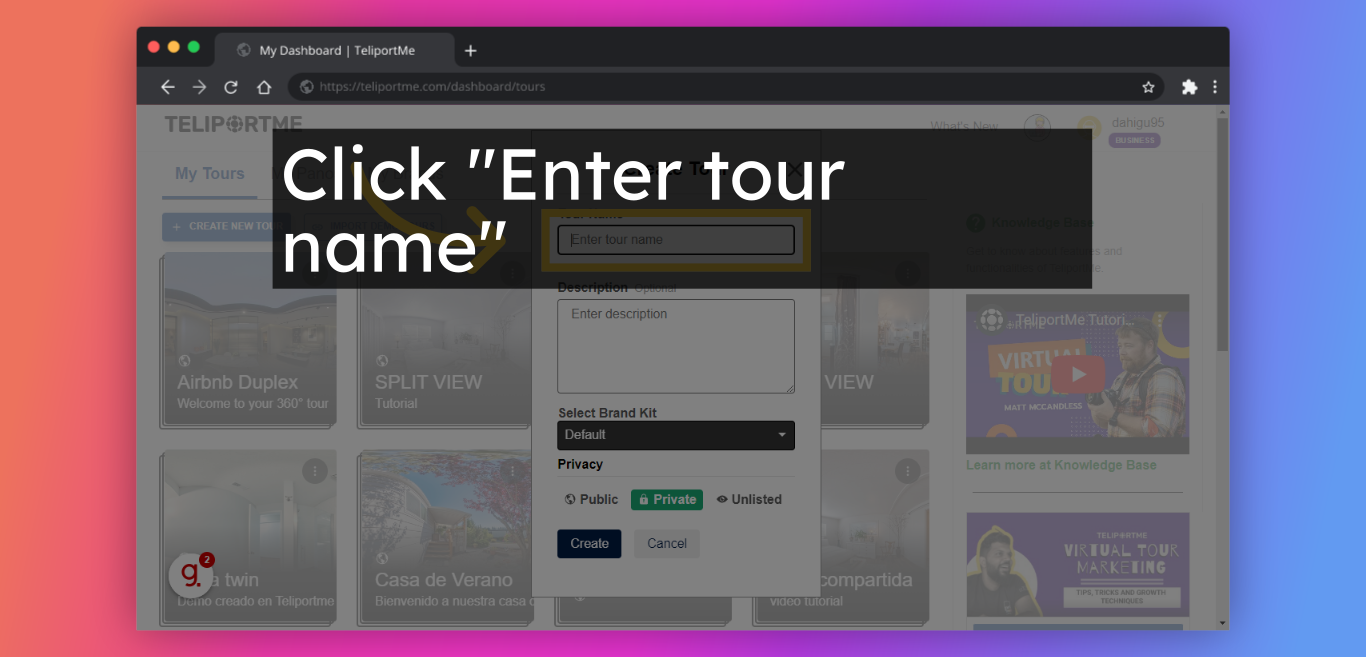
2. Click "Enter tour name".
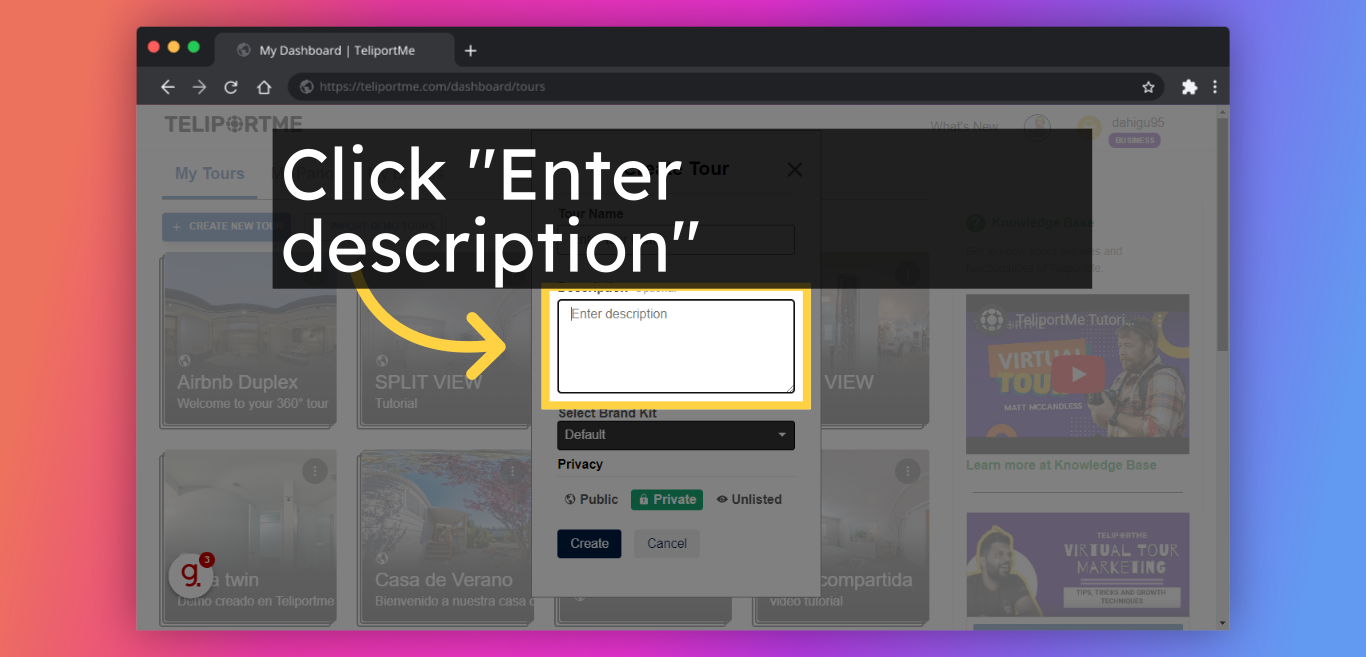
3. Fill in "Enter description".
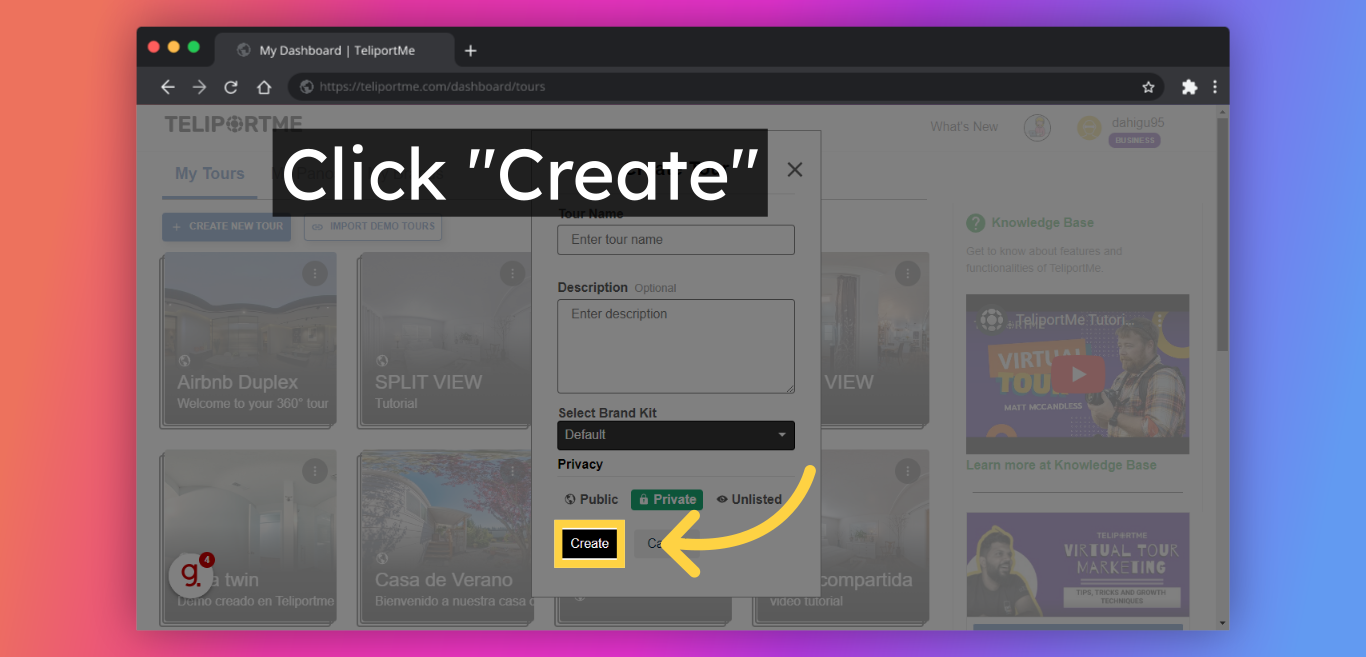
4. Click "Create".
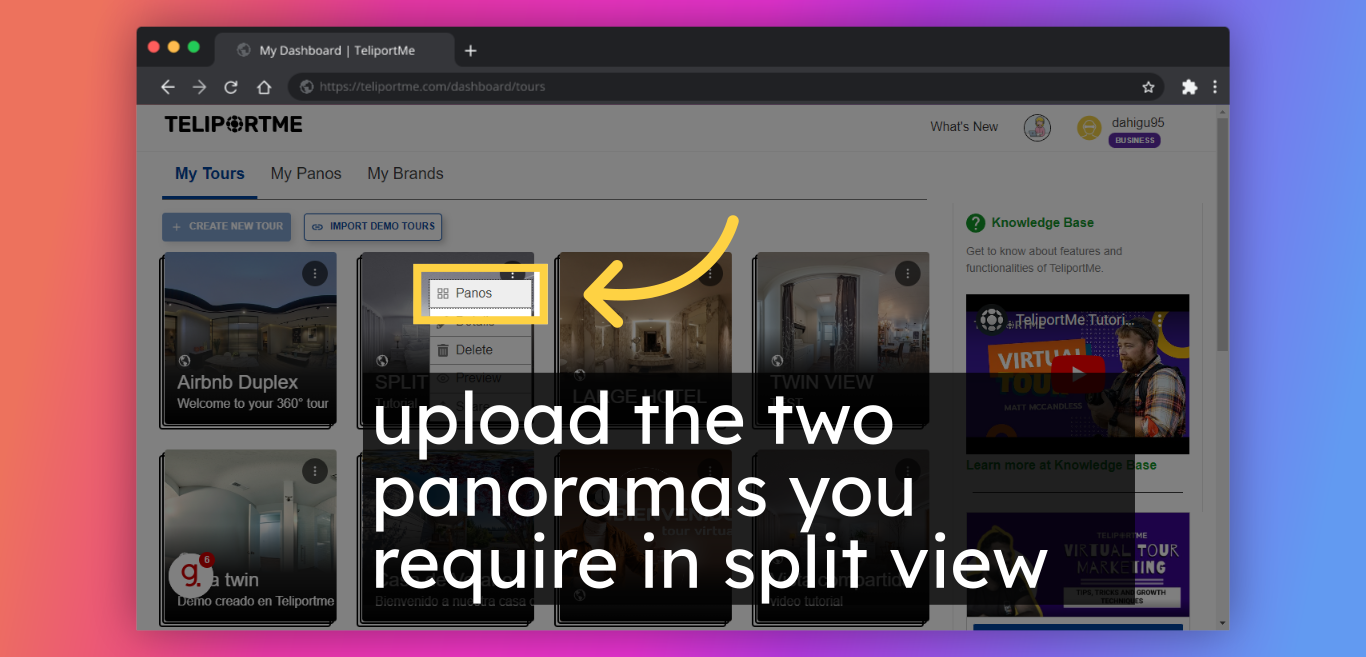
5. Upload the two panoramas you require in split view.
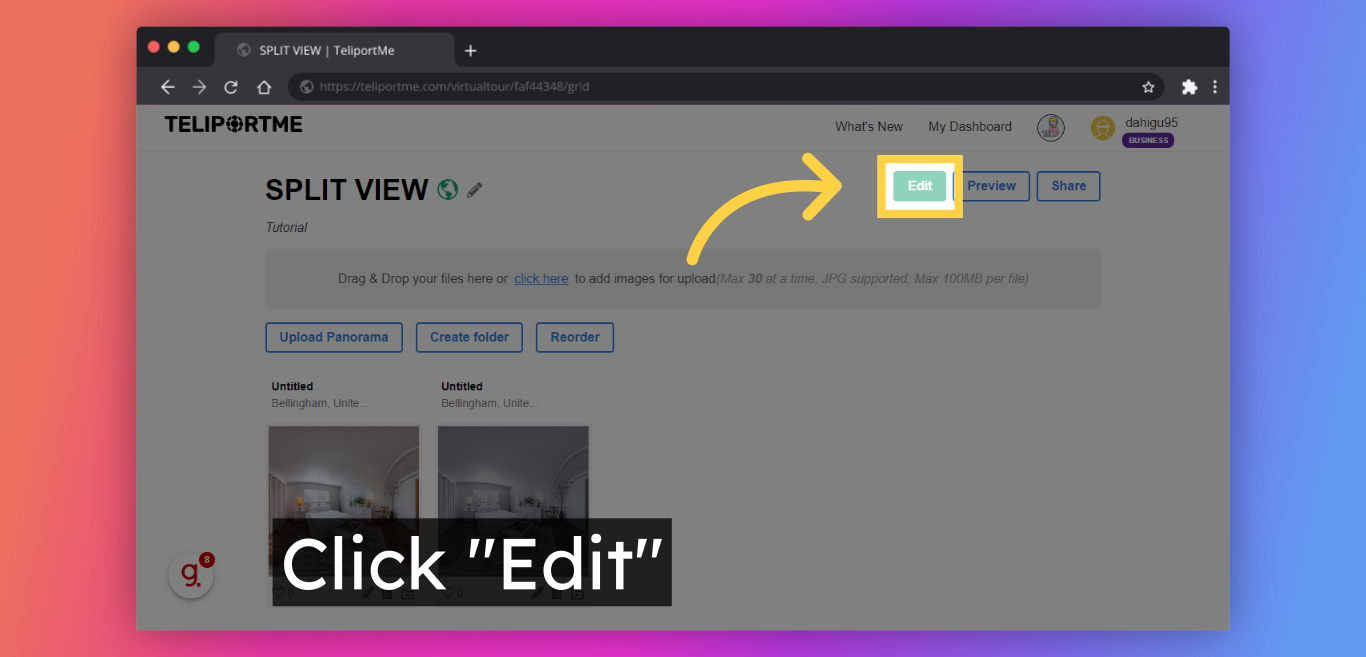
6. Click "Edit".
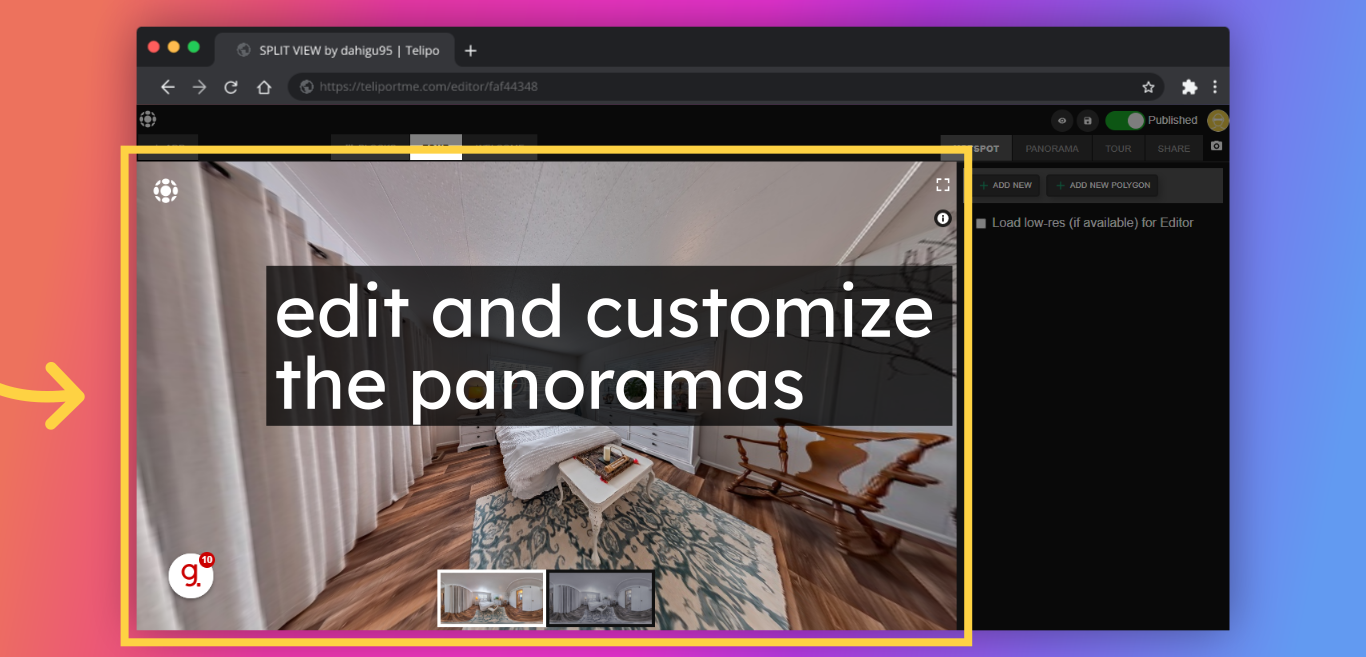
7. Edit and customize the panoramas by making sure that the initial position is the same in both panoramas.
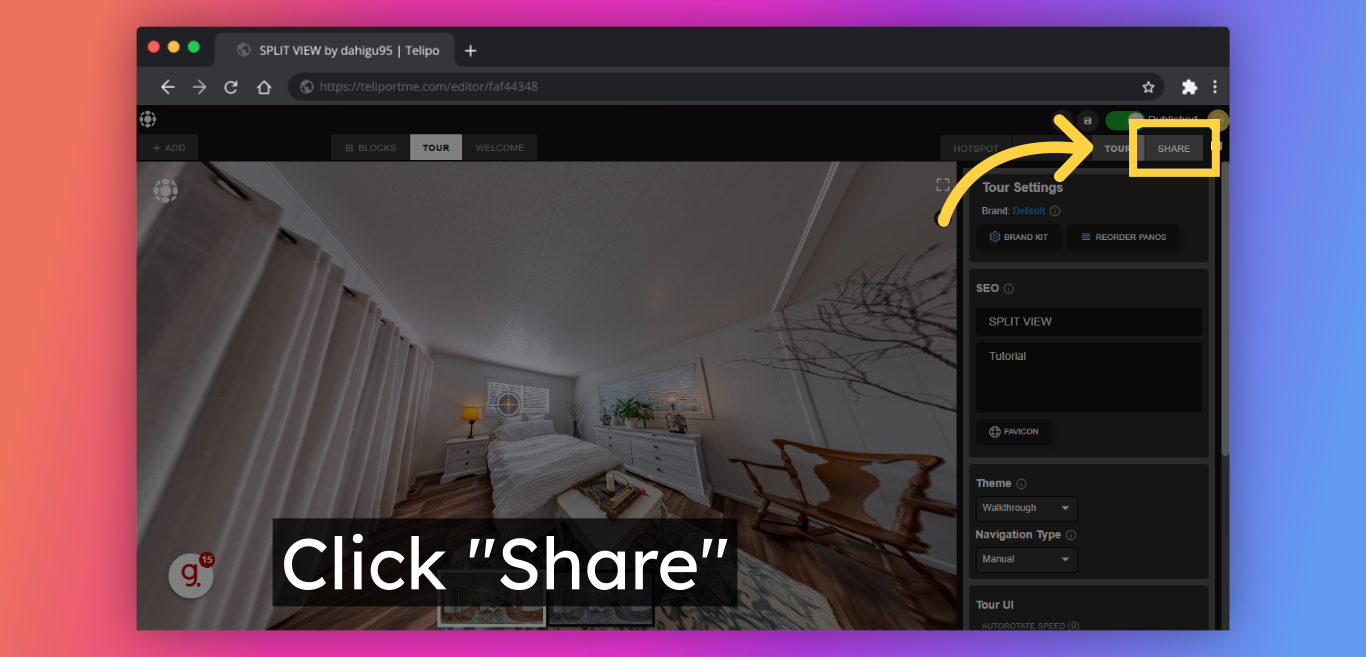
8. Click "Share".
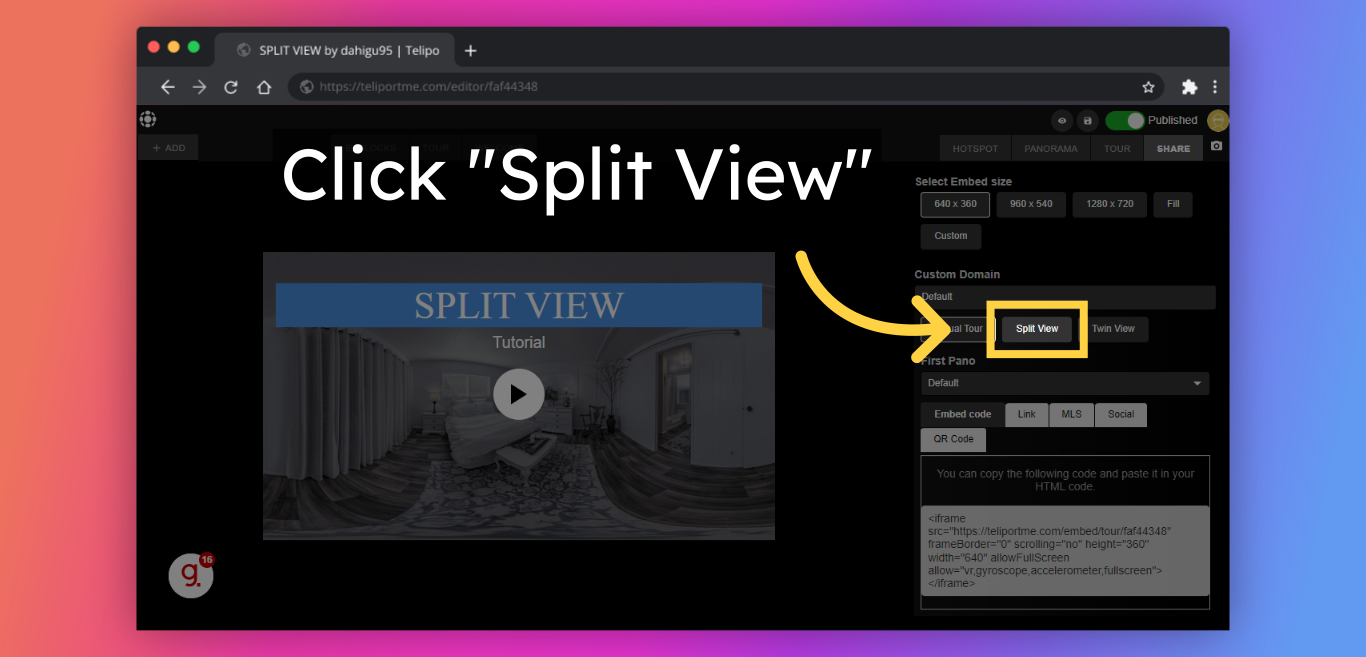
9. Select "Split View". Be sure to choose the Split View option to get the look you want.
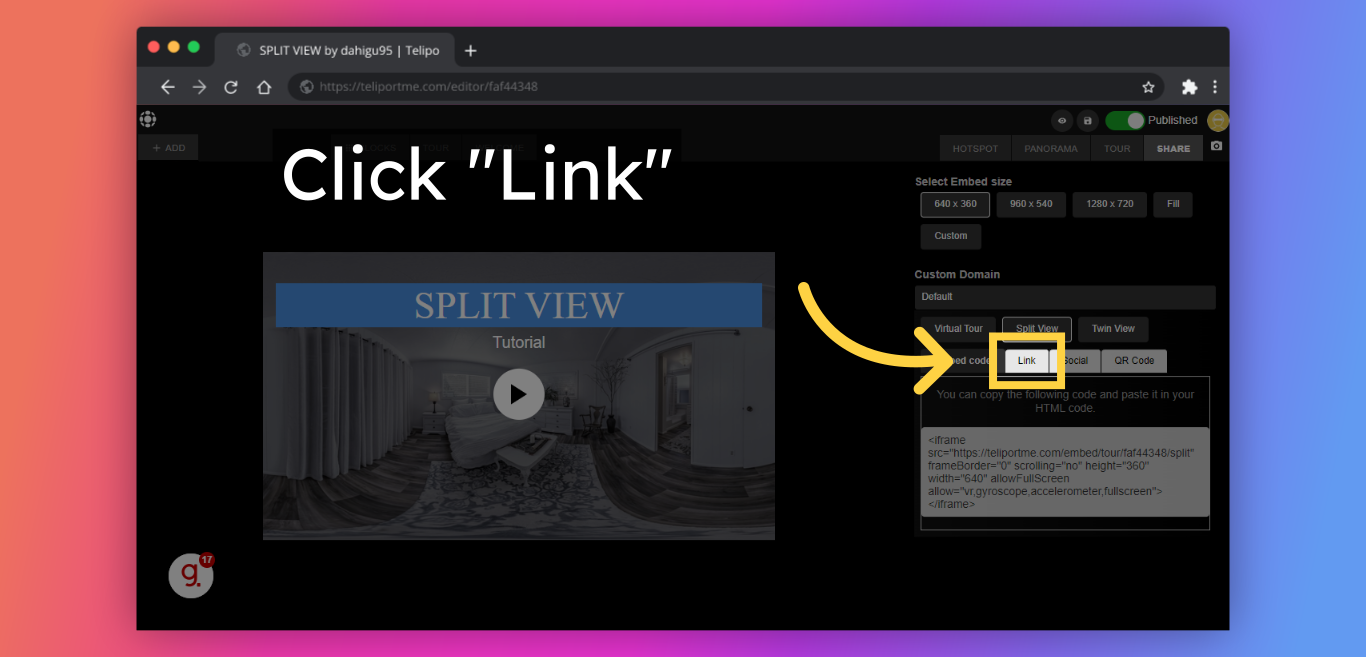
10. Click "Link".
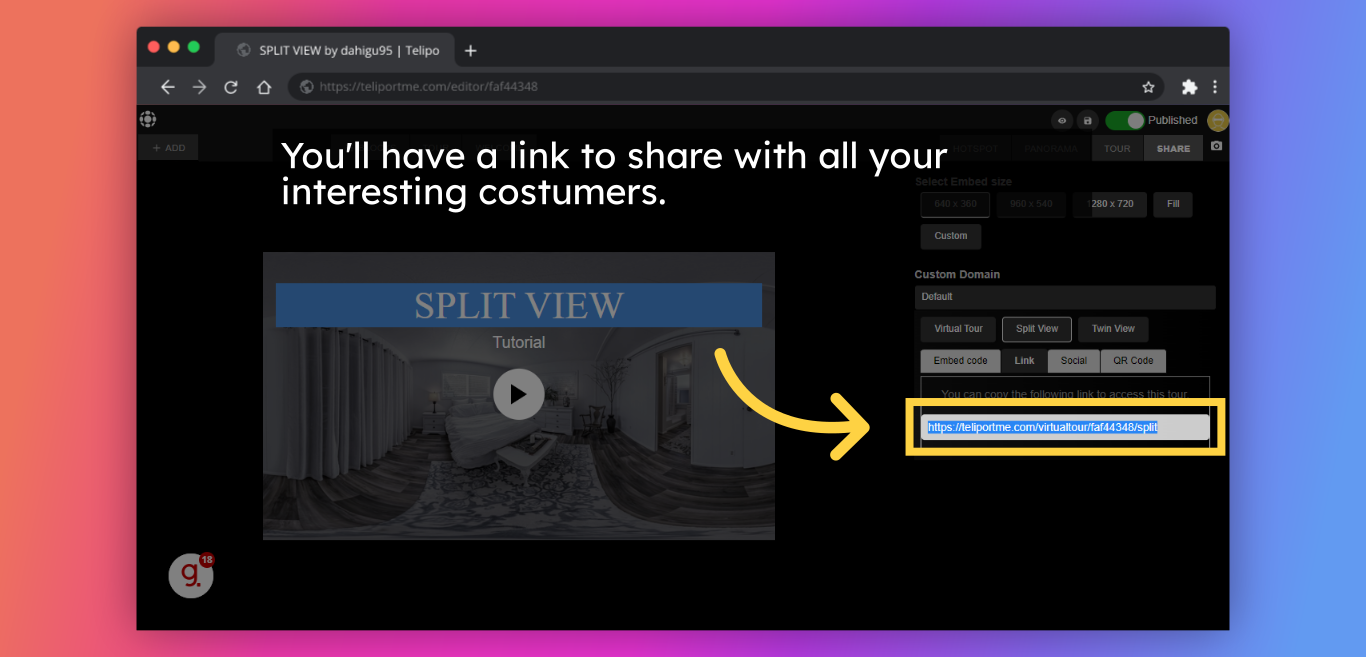
11. You'll have a link to easily share or copy the embed code to embed the split view on your website - it's that simple!
Check out this sample:
🌐 Explore TeliportMe: https://www.teliportme.com
🚀 Check out our Features: https://www.teliportme.com/features
📚 Read our Blog: https://www.teliportme.com/blog
▶️ Check our channel: https://www.youtube.com/@TeliportMe
🛍️ Buy our Products: https://www.teliportme.com/pricing
📸 TIPS in our group https://www.facebook.com/groups/virtu...

