Understanding View Position & Direction in Your Virtual Tour
This guide explains how initial view position, hotspot view direction, and navigation settings work together — and how to control exactly where a panorama opens and which direction it faces.
1️⃣ Initial View Position (Panorama Default Opening View)
Each panorama has its own Initial Position.
This determines:
How the panorama opens when selected from the thumbnail bar
The default orientation if no hotspot view override is applied
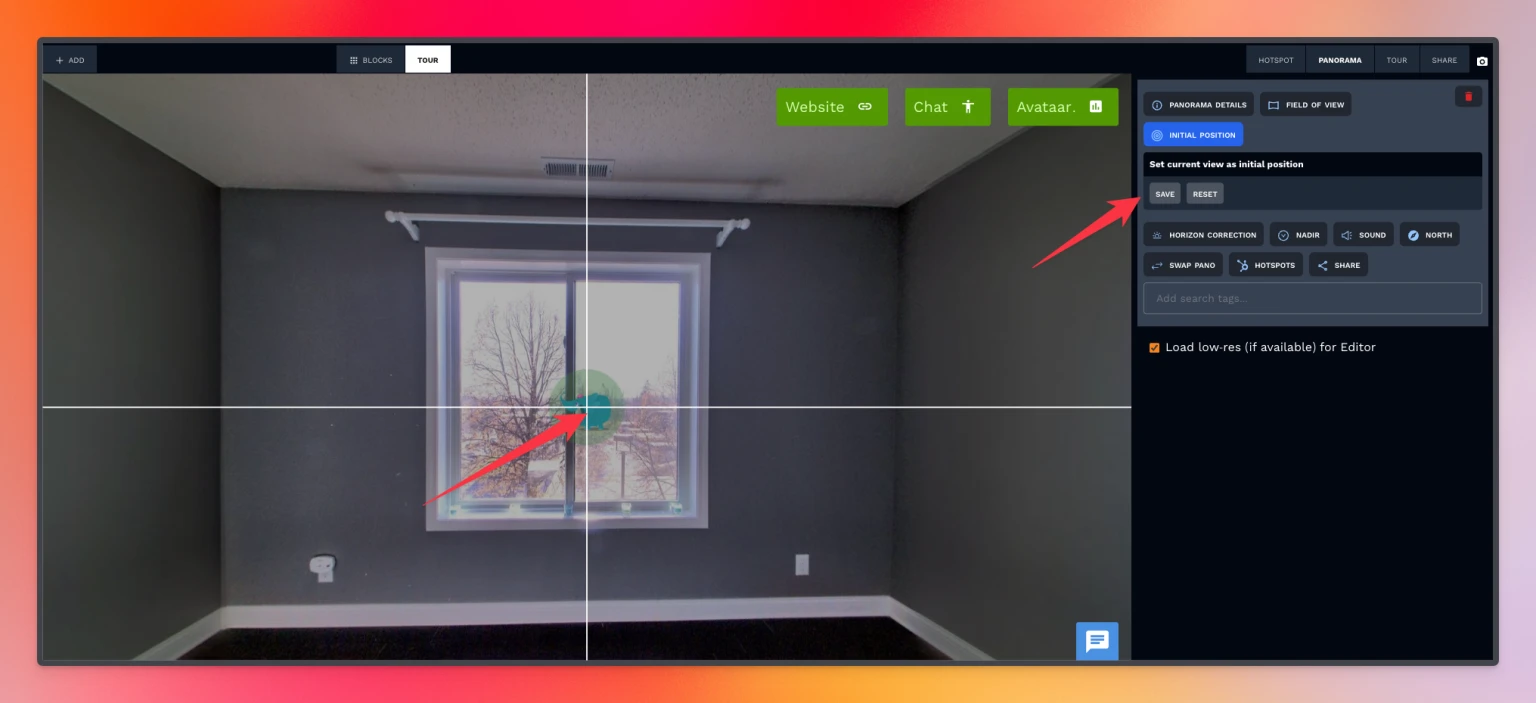
How to Set the Initial Position
Open the panorama in the editor.
Rotate the view to the exact direction you want users to see first.
Go to Panorama → Initial Position.
Click Save.
Now, whenever that panorama opens directly (from thumbnails or list view), it will open facing that direction.
2️⃣ Hotspot View Direction (Overrides Panorama View)
This is the most important concept.
When you click a navigation hotspot, it does NOT always open using the panorama’s initial position.
Instead:
The hotspot has its own saved view direction.
So:
Clicking from thumbnails → uses Initial Position
Clicking from hotspot → uses Hotspot View Direction
That’s why sometimes it feels like the panorama is “opening backward.”
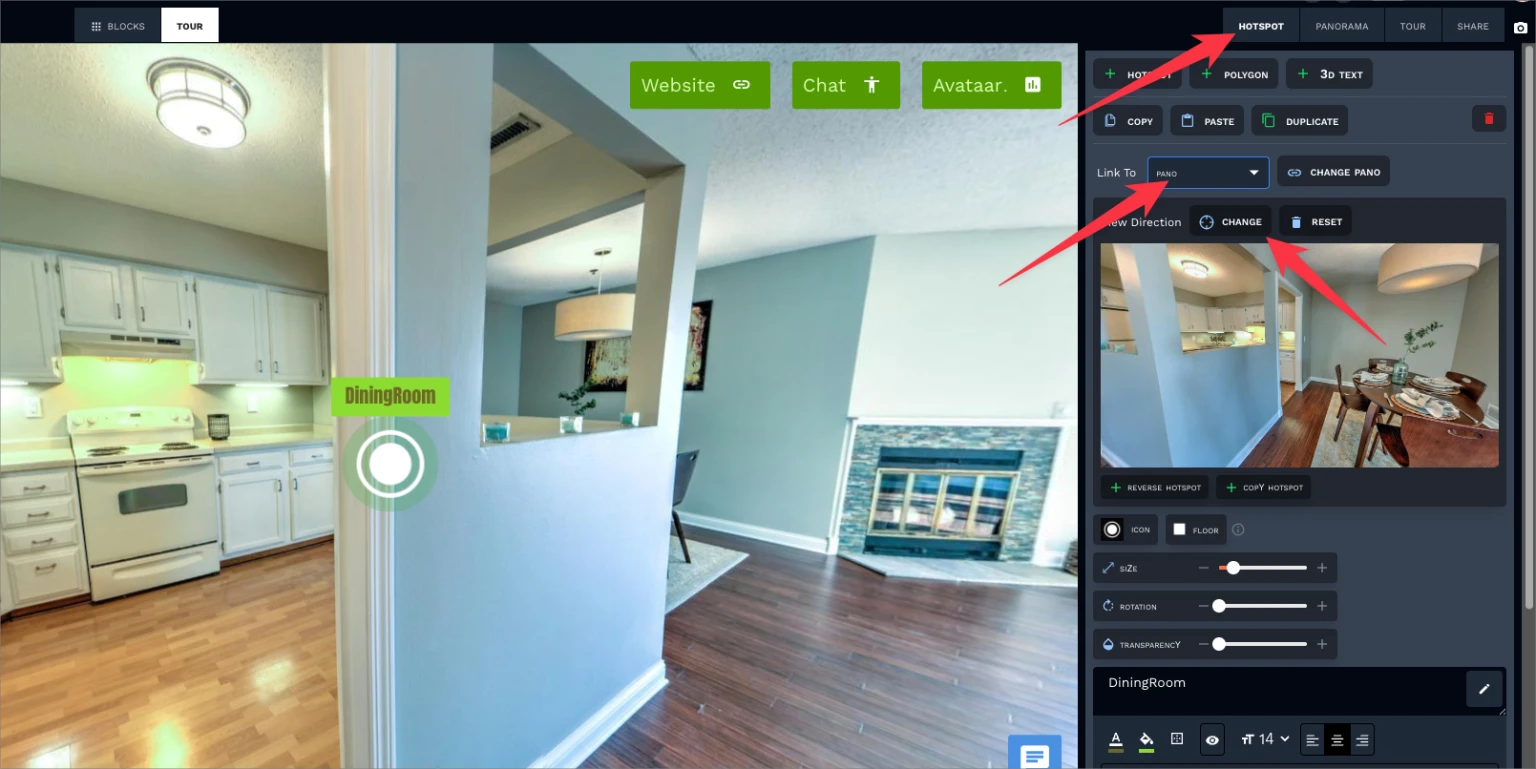
How to Fix a Hotspot Opening in the Wrong Direction
Open the panorama that contains the hotspot.
Click the hotspot you want to adjust.
Rotate the view to the direction you want it to open in.
Update the hotspot’s view direction.
Click Save.
Refresh after about 1 minute (changes may take time to propagate).
Now, when users click that hotspot, the panorama will open facing the correct direction.
3️⃣ Key Concept: Why This Happens
There are two independent settings:
Action | What Controls It |
|---|---|
Opening from thumbnails | Panorama Initial Position |
Opening from hotspot | Hotspot View Direction |
If these don’t match, the panorama appears to open differently depending on how it’s accessed.
This is normal behavior — but it must be configured intentionally.
4️⃣ Recommended Workflow (For Smaller Tours)
For tours with 5–10 panoramas:
✅ Focus on manually setting each hotspot’s view direction
✅ Ignore automatic navigation
✅ Test each navigation path manually
Example workflow:
Click hotspot A → confirm it opens correctly.
Click hotspot B → confirm direction is correct.
Repeat for all navigation points.
This gives you full control and produces the cleanest experience.
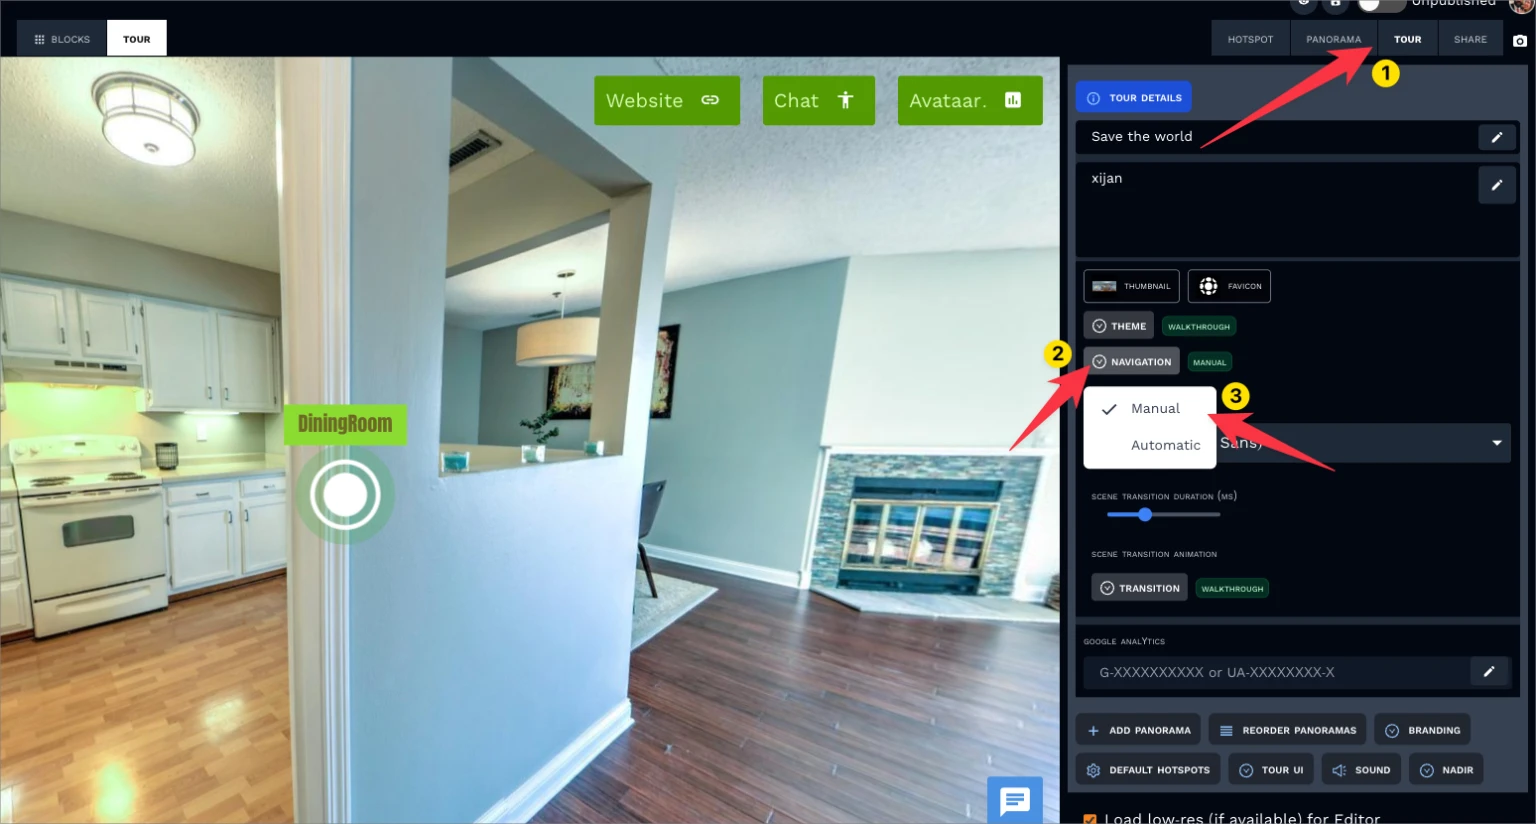
5️⃣ Automatic Navigation (Alternative Method)
If you prefer automation:
Go to Tour → Tour Details
Set Navigation = Automatic
Align all panoramas correctly to North.
⚠ Important:
Do not manually adjust hotspot view directions in this mode.
All panoramas must have correct north alignment.
Automatic mode works better for large tours with many scenes. You can read more about this in this help article : https://help.teliportme.com/article/35/automatic-navigation-mode
For smaller tours, manual hotspot control is usually better.
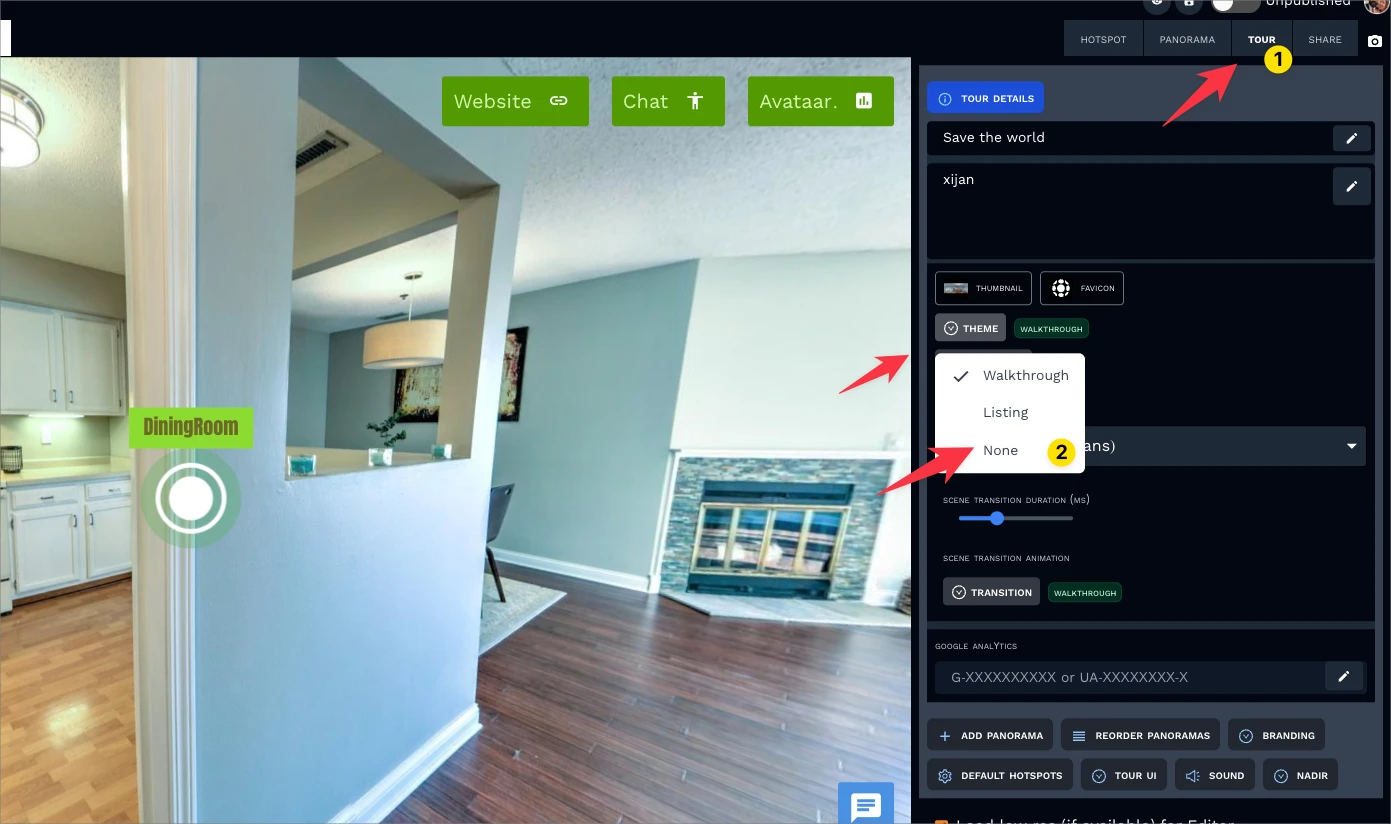
6️⃣ Removing the Thumbnail Bar (Optional)
If you want users to navigate only through hotspots:
Go to Tour → Details
Disable the thumbnail theme or set it to None
This simplifies navigation and avoids conflicts between thumbnail opening direction and hotspot opening direction.
Quick Troubleshooting Checklist
If a panorama opens in the wrong direction:
✔ Check the hotspot view direction
✔ Confirm the panorama initial position
✔ Make sure you're not mixing manual and automatic navigation
✔ Save changes
✔ Wait ~1 minute and refresh
Summary
Initial Position = Default panorama opening view
Hotspot Direction = Override when clicking navigation icons
Thumbnail click ≠ Hotspot click behavior
For small tours → manually set hotspot directions
For large tours → consider automatic navigation with proper north alignment
If you follow this structure and test each navigation path one by one, the tour will behave exactly as intended.